Blog
Jul 22, 2013
Windows 8 App Development Tips & Tricks: Part Three – Splash Screen and Sharing Tweaks


Welcome to the third installment of a three part series on improving your Windows 8 application. The series will share some simple ways to enhance functionality and the user’s experience. If you have not yet read the introduction, part one, and part two, I recommend it since it gives a quick explanation of the sample project we’ll be using.
Note: If you haven’t already, you will need to have a retail or trial version of Windows 8 and Visual Studio 2012. You can download them here.
In today’s post we’ll be covering how to add a splash screen to your application, while letting you discover on your own how to change your application’s icon in the start screen. We’re also going to go through a very important aspect of all apps nowadays, sharing. In this case our application will work as a source app, and we’ll work with the target app of Mail to share an article.
Open the starting project created for Part 3 in VS 2012 and let’s dive right in. Also, it is helpful to have Line Numbers turned on in VS 2012, in order to better follow the guide. To turn these on you can go to Tools > Options > Text Editor > All Languages > [Checkbox] LineNumbers
Topic 4 – Changing the Splash Screen of Your App
If you’ve been running this app over and over, you’ve probably noticed the white rectangle showing up whenever the app is opened. That’s actually the splash screen of the page, with its default settings. As a part of your project is a file called package.appxmanifest; open it. Click on the ApplicationUI tab and scroll down and click on Splash Screen on the left. There you are shown the splash screen image is inside the images folder and is named splashscreen.png. Look at the picture below for reference:
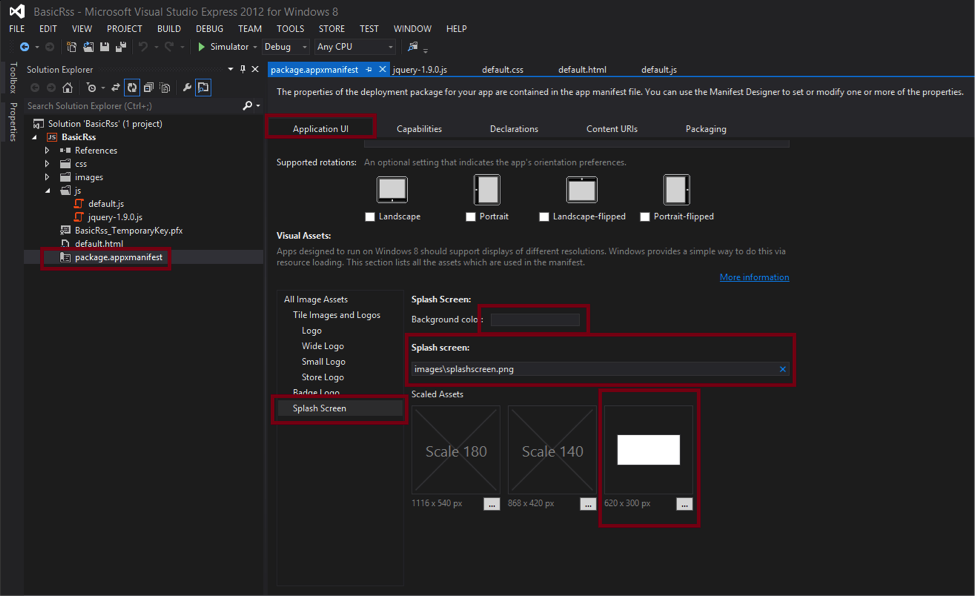

For the 1x scale splash screen, the file image must be 620 x 300 pixels. What I did was grab the default screen png and added the Credera logo. It’s located inside of your images folder. Change the splash screen source from images/splashscreen.png to images/credera_splashscreen.png. Right below you should see the white rectangle update to show the logo.
Above the location of the file you see Background Color. Here you can either type in a color or use # and type in the hex value of a color. For our purposes just type in white. If this field is left blank, it will default to the color of the tile as seen in the Windows 8 start screen.
From this screen, I’ll leave it up to you to figure out how to set your app’s logo that shows up on the Windows 8 app “metro” screen.
Topic 5 – Adding Sharing to Your App as a Source
The way sharing across Windows 8 apps works is through a middleman. I usually say cut the middleman out of the deal, but in programming the middleman helps make sure everyone understands what they’re doing by ‘translating’ the instructions into something each specific program understands. Here it’s called the DataTransferManager. Add the following two lines anywhere inside the default.js’ self-executing function; I added them right below the app.onactivated function:
var dataTransferManager = Windows.ApplicationModel.DataTransfer.DataTransferManager.getForCurrentView();
dataTransferManager.addEventListener(“datarequested”, dataRequested);
We are instantiating the DataTransferManager, and then attaching a function for it to call in order to obtain the data we are planning on sharing. In this case the function is going to be called dataRequested, just like the property. Right below these two lines, start out our function by pasting in the below code:
function dataRequested(e) {
var request = e.request;
//if viewing the article list
//share all the selected articles
//else
//share the article we are viewing
}
I decided I was going to use a global variable to keep track of which article I am in, and then share that article if need be. If we were not inside an article, we had to check which of the articles inside of the article list were selected, and share those. At the top of the page, go ahead and add the following global variable:
var _currentArticleNumber = -1;
To keep this variable updated, go to the itemInvoked function and add this line to the beginning:
_currentArticleNumber = e.detail.itemIndex;
This tells us which article was selected and opened. You can even replace the following line’s input variable to look like so:
var currentArticle = artList.getAt(_currentArticleNumber);
Inside of the backButtonClick function add the following line right before the animation:
_currentArticleNumber = -1;
This resets the article they are viewing every time they click the back button, which is when the article list is shown. This way we know, if _currentArticleNumber == -1 then we need to check which are the selected articles to be shared. If not, we can use that number to know which article we want to share.
Frustration Free Tip: Before we go any further, there is one thing you should check: do you have an application that works as a sharing receiver? By default the mail application is installed and that works great, just go ahead and make sure you can open it. It turns out my anti-virus software decided the app was dangerous and ended up corrupting it.
It took a while to figure out my app couldn’t share with any other app because there was no app installed and functioning correctly that could be the receiver. If your mail app becomes corrupted too, just opening it will trigger a message asking if you want to fix it.
Let’s start out with sharing just one article. In the dataRequested function we started recently, you can replace the commented pseudo-code with the following:
if (_currentArticleNumber == -1) {
//share multiple articles
}
else {
//share 1 article
var currentArticle = artList.getAt(_currentArticleNumber);
request.data.properties.title = “Check this article out!: ” + currentArticle.title;
request.data.properties.description = “This is the description!”;
request.data.setText(currentArticle.content);
}
This request variable is what we set for what we want to share. It is understood by the Sender (us) and the Receiver (the mail program). We are obtaining the currentArticle object from the artList (articleList) by telling it which article we are on. Once we get the object, we use it to populate the request’s title and text. The description property is actually optional and I ended up commenting it out in my code this time. But you can leave it un-commented to see what it looks like and where it shows up.
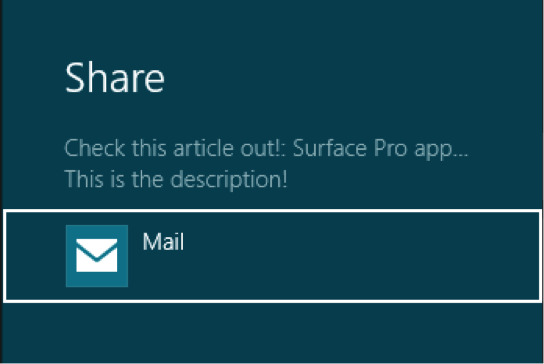
Start the debugger, choose an article, and then move your mouse to the top-right or bottom-right corner of the screen and select Share. Another option is to click Win + H as a shortcut to share. You should see at least the mail app show up as a sharing destination app:
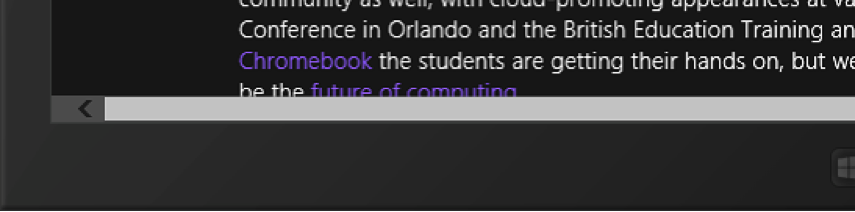
If you click into the mail app, you might see something like this:
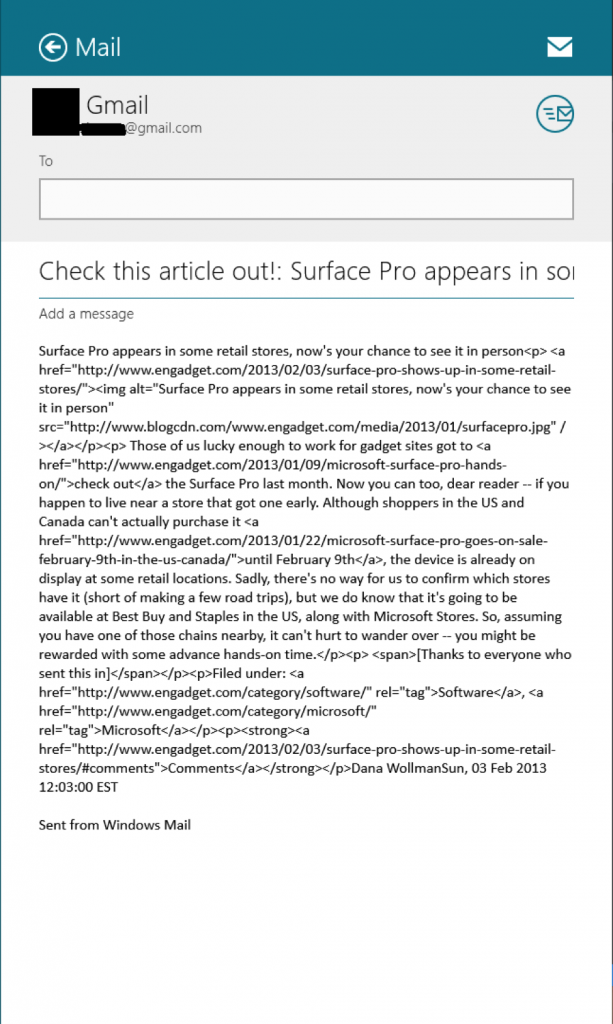
Oops, that’s not exactly how we wanted it.
Frustration Free Tip: Once you start debugging a lot with the Share functionality, you will most likely come across a Share screen that looks like this:
The circle just keeps on going around and around forever, and you’re confused as to what happened.
It turns out, if you set a breakpoint inside of the dataRequested function and it gets hit, pausing the application, and then you stop the debugger instead of continuing (for instance, because you found your error), the Share charm will bug out and stop working.
The solution? Restart your computer. No, I’m kidding, or at least half kidding. While restarting your computer would solve the issue, it’s a big pain to do that every time you mess up debugging this. Instead click Ctrl+Shift+Esc to open the Task Manager, and find the Windows Explorer app.
Right click on that and click Restart. Did you accidentally click End Task and now you don’t see your desktop? Click File > Run New Task, then just type in explorer and click the <Enter> key. Aaaaaand, we’re back.
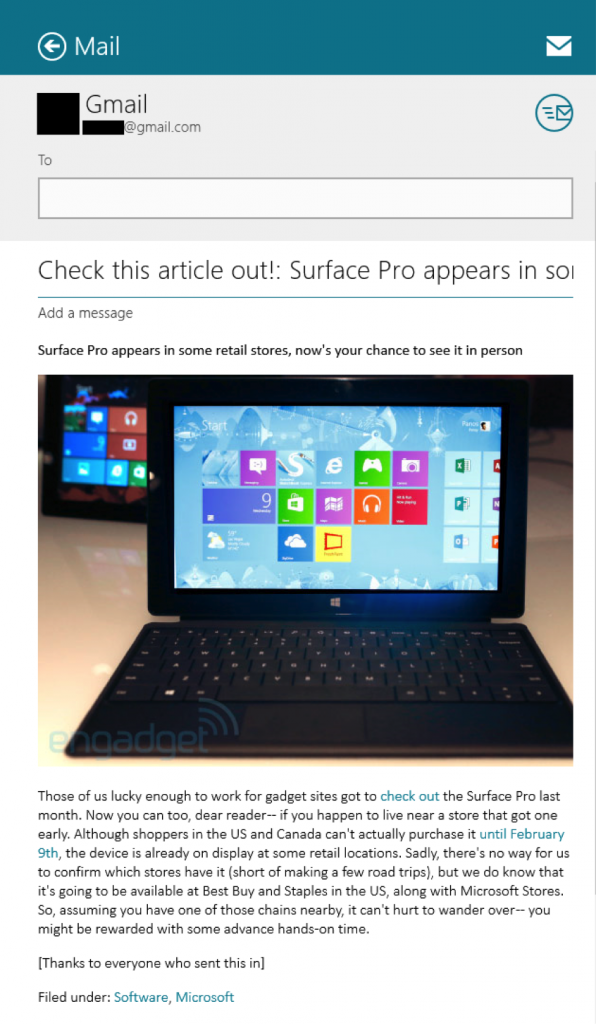
Obviously, the Mail app does not understand that our content is in HTML. Fortunately, that’s because we’re sending it to the ‘translator,’ the DataTransferManager, incorrectly. We used request.data.setText(), and I’ve come to figure out that it sucks. I actually could not figure out how to use setText() and pass in a newline character. When I tried to send a list of multiple links separated by a new line each, \r\n was ignored, using the HTML safe of CR/LF was ignored, and <br /> ended up just being typed literally. Instead of telling the DataTransferManager we’re sending text, let’s say we’re sending HTML, since we know how to work with that. Replace the request.data.setText() line with the code below:
var htmlArticle = Windows.ApplicationModel.DataTransfer.HtmlFormatHelper.createHtmlFormat(currentArticle.content);
request.data.setHtmlFormat(htmlArticle);
The HTMLFormatHelper is needed to create appropriate HTML, with a header and body, so the app will accept it. If you don’t use that line you’ll get an error. If you look at your shared mail now, it should look beautiful:
Now that we learned how to share one article, sharing multiple articles—in this case simply links—is an easy task. Paste the code below into the if section of the statement:
if (_currentArticleNumber == -1) {
//share multiple articles
var selectedArticles = document.getElementById(“articlelist”).winControl._selection.getIndices();
request.data.properties.title = “I thought you might like these articles from Engadget!”;
request.data.properties.description = selectedArticles.length + ” articles you enjoyed”;
var hyperlinks = “”;
selectedArticles.forEach(function (value) {
var article = artList.getAt(value);
hyperlinks += ‘<br/><br/>’ + ‘<a href=”‘ + article.link + ‘”>’ + article.link + ‘</a>’;
});
hyperlinks = hyperlinks.replace(/<br\/><br\/>/, ”);
request.data.setHtmlFormat(Windows.ApplicationModel.DataTransfer.HtmlFormatHelper.createHtmlFormat(hyperlinks))
}
The first line is important to note. The articlelist div seen in default.html has a property data-win-control=”WinJS.UI.ListView” which we talked about briefly in the introduction. That means this div is a ListView and, as such, has certain properties. The winControl._selection.getIndices(); section returns an array of indices that are selected by the user. Using the array’s length we figure out how many articles there are and display it in the description.
We then loop through the array and get the article object from our Javascript artList global variable. The object was given a link property inside of the downloadEngadgetBlogFeed function, where we took the hyperlink. I’m then using some HTML to make it show as an actual link in the email, not just text. I set <br/> tags before each link and then simply remove the first set. Once I have all the links as HTML text, I pass it to the request variable and we’re done!
Ending Thoughts for Part 3
In this week’s post we learned how to customize the splash screen image that comes up when you open your Windows 8 application. Hopefully this gave you enough insight to be able to figure out how to change your app’s logo as well.
We also gave our app the ability to share with other apps through the use of some WinJS functions. We talked about instantiating the DataTransferManager, figuring out if we want to send one or multiple articles, and how to send the items we want to share. We saw that setText() is not as powerful as setHtmlFormat(), and we learned how to easily encapsulate our data with some required HTML text. We also touched on a bug that you might encounter when trying to debug and share your code, and how to fix it.
Blog Series Recap
Throughout this blog series we’ve talked in Part 1 about using jQuery with Windows 8 and how to use WinJS Javascript animations to make our application more fluid. In Part 2, we used a bit of ingenuity to create dynamic height for our article content div so it displays accordingly in all screen sizes, with no overlap of the scroll bar. Finally in Part 3, we added a splash image to our app, and we gave it the ability to share to other applications. These are only a few small tips for ways to improve your Windows 8 application.
If you’ve run into any ridiculous frustrations from simple, dumb things you think might have plagued other programmers, please share below. I’m always interested in hearing about quirks I can avoid with code.
Cheers, and as always, enjoy the journey, not just the destination! Follow us at @CrederaMSFT for more great tips and tricks to Microsoft development, or if you have questions please use the comment box below.
Contact Us
Let's talk!
We're ready to help turn your biggest challenges into your biggest advantages.
Searching for a new career?
View job openings