Technology
Sep 10, 2014
Modern Web Development Best Practices Powered by Grunt.js Part 9: CDNs


Let’s go over a few more tips and tricks to get better performance in your apps. As we have previously mentioned, the top three surefire ways of decreasing the load time of your web apps are:
1. Decrease the number of HTTP requests. 2. Make the files requested as small as you can. 3. Leverage caching mechanisms.
CDN
If you are already doing those things, another enhancement you can make is to use a Content Delivery Network (CDN). CDNs are distributed systems that host and serve content to clients. The main advantage they have over the traditional “single” server client communication is that on a CDN the content is mirrored across a network of data centers instead of a single one. This means that when multiple simultaneous requests for an asset come in, the CDN will deliver them from different places (depending on where the request is physically coming from, the content will be delivered from the network that is closest). In most cases your CDN will be provided by a third party,, which means you’ll need to pay a fee (different providers have different pricing models). This is a must have for very active applications and/or applications that use lots of images. So let’s see how we can set up our sample project to leverage a CDN.
TUTORIAL:
“git checkout cdn”
“npm install”
For this approach we will use yet another Grunt.js plugin called “grunt-cdn.” This plugin does one thing, and it does it very well. It basically scans your chosen files and replaces absolute (and optionally relative) paths inside of “href” and “src” attributes in your HTML with the path to a CDN you configure. Note: You can really configure the CDN path to point to wherever you want (e.g., another folder or another server in your network). To enable this functionality all we need to do is modify the “grunt.initConfig” section to include this object:
    cdn: {
      options: {
cdn: 'http://cdn.localhost/',
flatten: true
},
dist: {
src: 'index.html'
}
}
We can also add the “cdn” task to run after our “usemin” in the “build-prod”:
  grunt.registerTask('build-prod', [
    'jshint',
    'compass:clean',
    'compass:prod',
    'useminPrepare',
    'concat',
    'uglify',
    'rev',
    'usemin',
    'cdn'
  ]);
You will see something like this when you run the task:
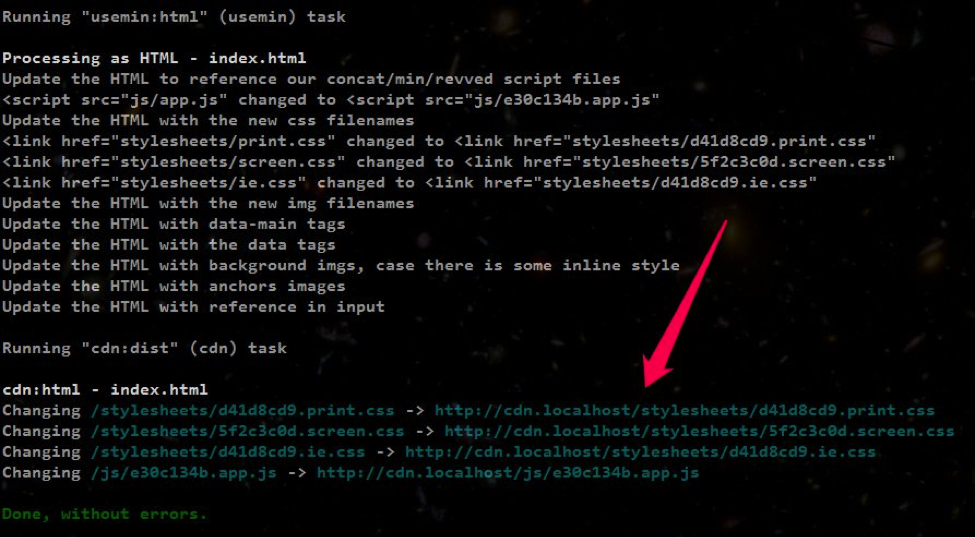

Note how all the paths to local folders get rewritten and appended with the CDN URL specified in the configuration. So this might not be as useful for local development. Running a task like “cdn” is usually done when building the package (hopefully by an automated process like a Continuous Integration server) that will be deployed. That way the CDN prefixing is transparent to the developer.
In the rest of this series, we’ll go over some other advanced concepts like CSS sprites, image optimization and a few other tricks. We’ll also see how to use more Grunt.js features and plugins and how to implement them. In the meantime, follow @CrederaMSFT on Twitter and Credera on LinkedIn for more great best practices.
To view the rest of the Modern Web Development Best Practices Powered by Grunt.js series click here.
Contact Us
Ready to achieve your vision? We're here to help.
We'd love to start a conversation. Fill out the form and we'll connect you with the right person.
Searching for a new career?
View job openings