


The purpose of this tutorial is to teach you how to:
– Create an ASP.NET project using AngularJS from scratch.
– Create a module.
– Create a controller.
– Bind an object within an HTML page.
– Demonstrate a filter along with two-way binding.
Notice: This tutorial is not intended to showcase proper application design or implementation, but instead to get you started by teaching you some of the basics of AngularJS.
PROJECT SETUP
First we need to set up our project. In this section, we will be building an ASP.NET project based on the Empty template, adding the reference to AngularJS and setting up our solution.
1. Open Visual Studio. In this tutorial, I am using VS 2013 Ultimate, but VS 2013 Community Edition is a free, full-featured version that will also work.
2. Select File -> New -> Project…


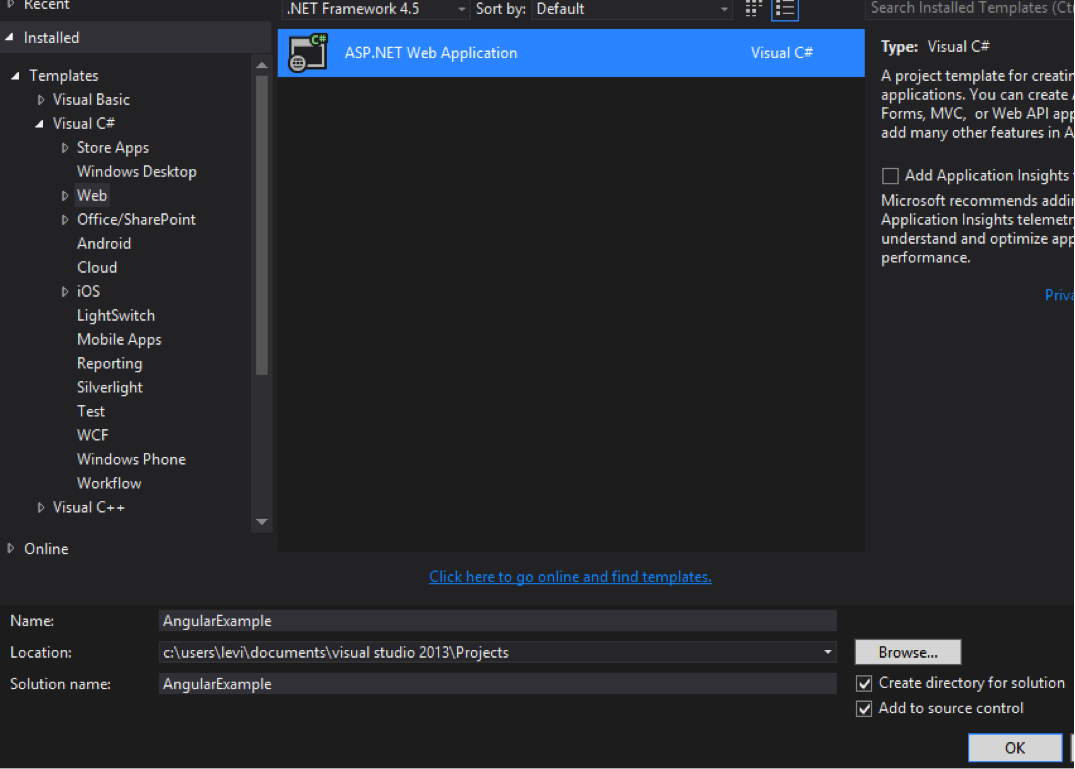
3. Select Templates -> Visual C# -> Web -> ASP.NET Web Application and Name your project AngularExample.
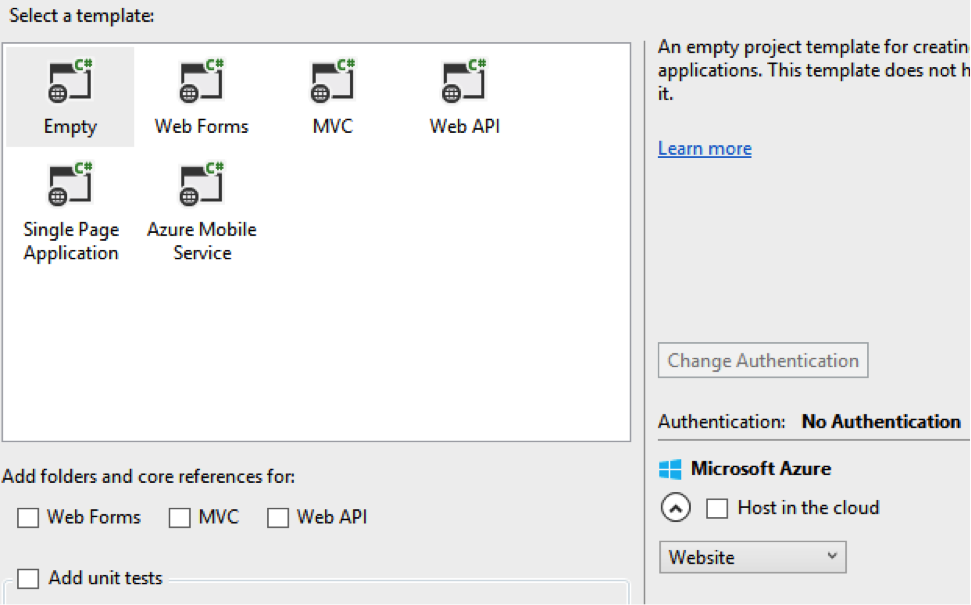
4. Select the Empty project template and click OK.
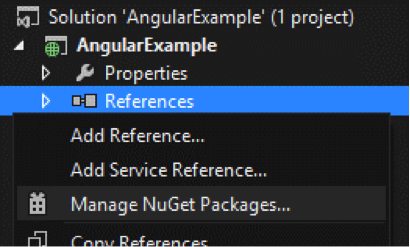
5. Right click on your References and select Manage NuGet Packages.
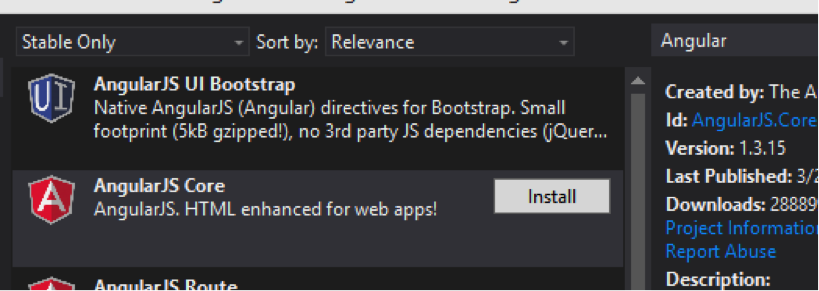
6. Search for Angular and install AngularJS Core.
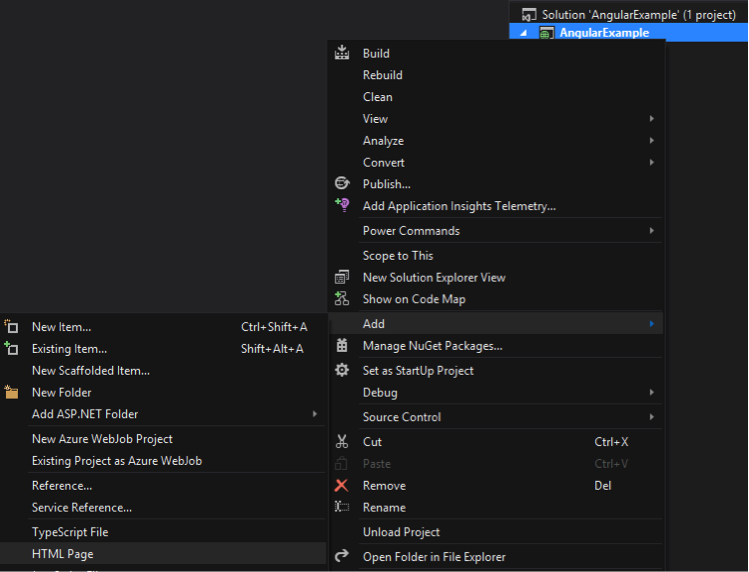
7. Right click on your Solution (AngularExample) and select Add -> HTML Page then name it Index and press OK.
8. Now add one folder by right clicking on the Solution and selecting New Folder. Name it MyAngular.

We will be storing our Angular related code in the MyAngular folder.
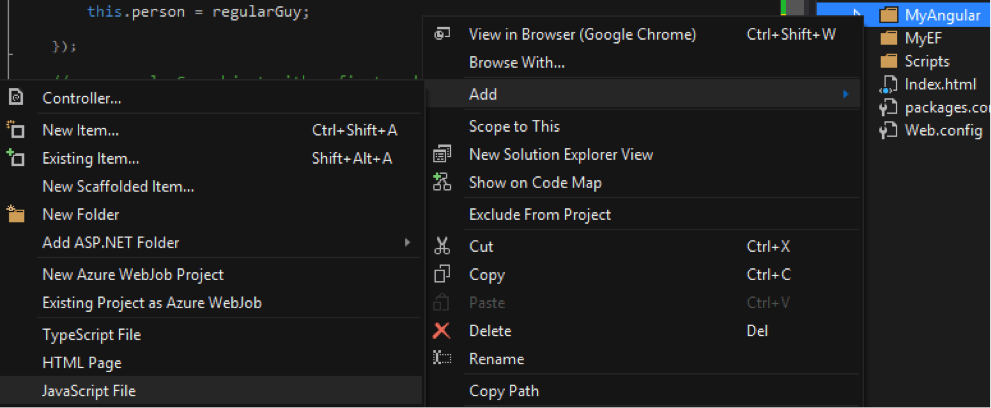
9. Right click on the MyAngular folder and select Add -> JavaScript File, then name it MyApp.js.
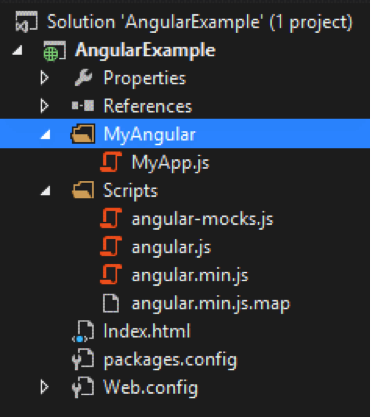
10. Your solution should look like this
ANGULAR BASICS
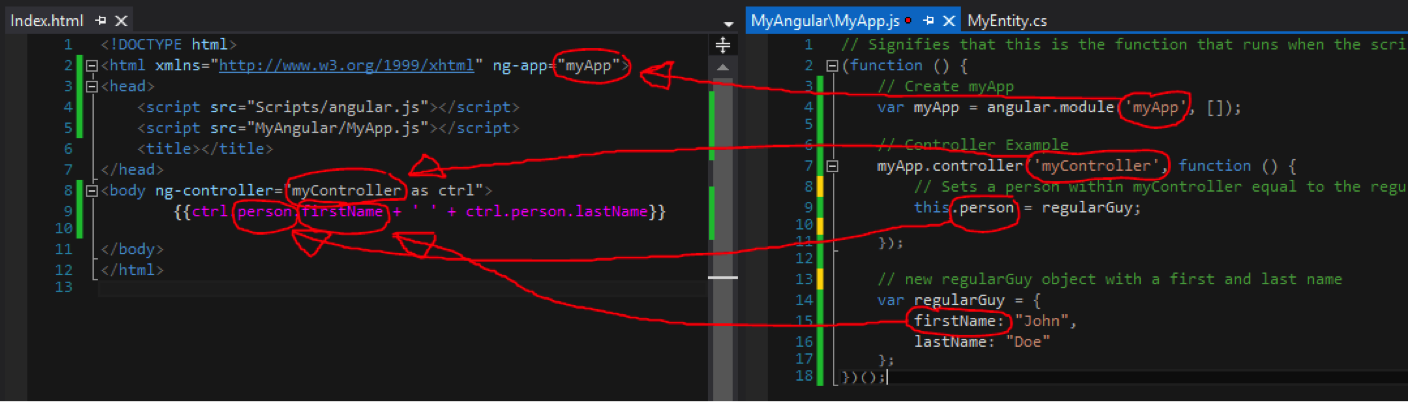
Next, we have to create a module. A module is a container for all of the parts of your application (e.g., controllers, filters, directives, etc.). Once the module is created, we will create a new controller called myController, which will host the primary functionality our app will use. In our case, it will simply be setting a variable named person to the value of a JSON object called regularGuy. Once our JavaScript code is written, we will start binding it within our HTML page.
1. Open the MyApp.js file and add the following code:
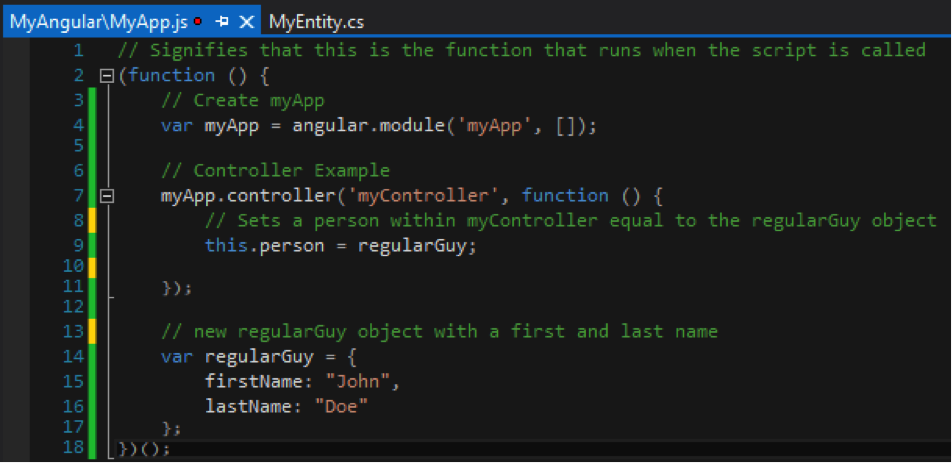
a. First, the function simply sets the scope of the MyApp.js file. It’s a large function which runs all the code within the curly brackets { }.
b. myApp – We are creating a new module called “myApp” which represents our new Angular application. You need to add the empty array [] inside of the arguments because if you had dependencies, that’s where they would go. But for now we will not be adding any, so an empty array will do.
c. myApp.controller – Here we are creating a controller for myApp called “myController”. A controller handles the functionality between the View (our HTML) and the model (which is our data and we will eventually be using EntityFramework to connect it to a database.
i. this person – Here we are creating a person object and setting its value to regularGuy.
d. Var regularGuy = {} – Here, we are creating a basic JSON object which contains a firstName and a lastName.
2. Open Index.html and add the following HTML code snippets:
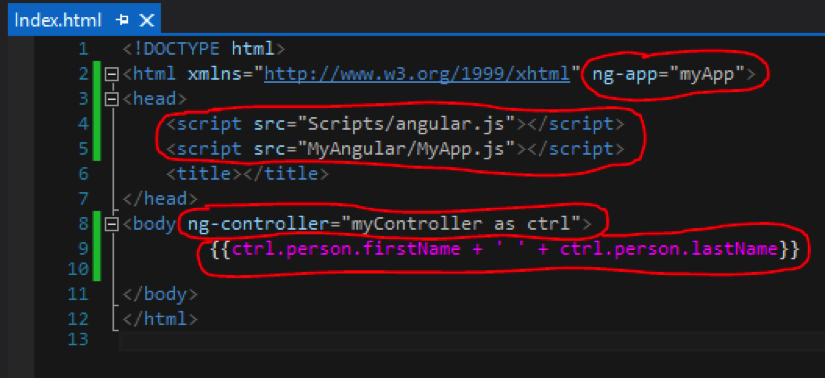
a. ng app=”myApp” – Here we are specifying the module this page will be using which you created earlier.
b. script src=”…”– Here we are specifying the scripts that should be loaded when the page is rendered. We need the angular.js file to run or we wouldn’t be able to use any of the functionality Angular enables. We also need to load our MyApp.js file so we can access the functionality we created.
c. Line 8 – This is specifying that anything within the scope of the body/ element will have access to the controller. By adding the ‘…as ctrl’, we are simply creating an alias in which ctrl represents the myController.
d. Line 9 – This is an Angular expression. When you run an Angular application, everything within the expression is evaluated. In our case, we want the person’s first and last name with a space in between them.
3. Here is an illustration to better show how it all fits together:
4. Run the project by clicking the Green “Start” (F5) icon to ensure everything works.
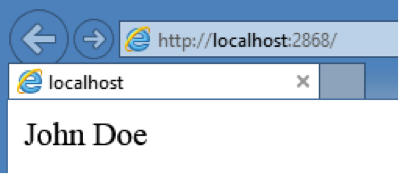
5. You should see “John Doe” on the page ( firstName + {space} + lastName ).
TWO-WAY DATA BINDING
One of the best parts about Angular is the two-way data binding feature. This provides us the luxury of not having to write the extra code to retrieve values from the user interface (UI) whenever they are changed. It means that whenever a property (such as the firstName) changes, the expression is automatically re-evaluated so our objects (in our case, person) are in sync with any changes made to them from the UI and the UI is in sync if objects are ever altered by the application.
To illustrate this, we will add two <input/> elements. One will be bound to the firstName property and the other will be bound to the lastName element.
1. Within the body/ element, add the following code:
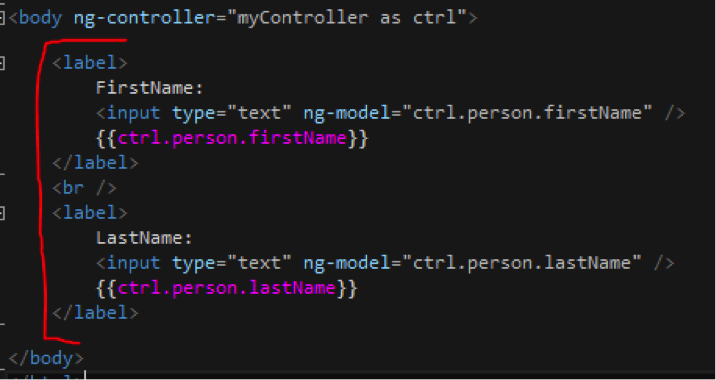
a. ng model – This directive allows us to bi3nd the values from an object to an input textbox and vice versa.
b. Now, whenever the textbox value is changed, the object’s value (person.firstName for example) is also changed. Because of this, whenever you change the value, our expression ctrl.person.firstName … will be re-evaluated in real time.
2. Run the project again and try changing the values inside each of the input textboxes (you may also Save the Index.html page and Refresh the page in IE).
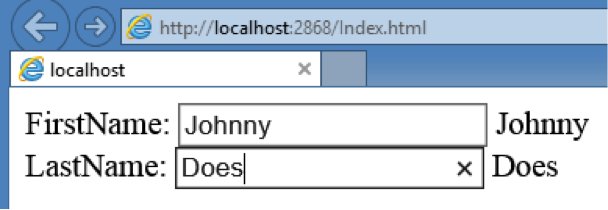
a. Notice that by default, the value is bound to the value of the object. If you changed the regularGuy’s firstName to “Hank” then that would be the initial value within the textbox.
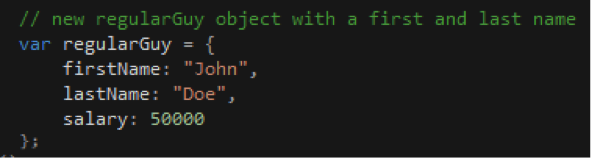
3. Let’s go ahead and add a salary property to our regularGuy object. Open MyApp.js and simply add “salary: 50000” within the regularGuy object. It should look like this:
4. Open index.html and add the following code below the LastName label:
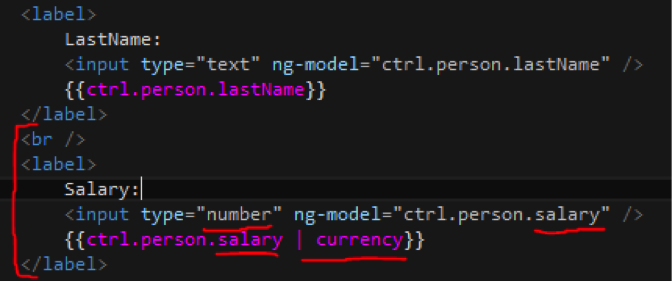
a. Notice the “ctrl.person.salary” now has “… | currency” within it. This is a filter and it tells Angular to format this value as currency.
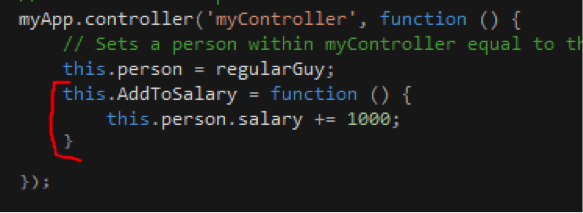
5. Open MyApp.js and add a method within the controller which will add $1,000 to the salary:
6. Now add a button to Index.html which uses the ng click directive to call the AddToSalary method:
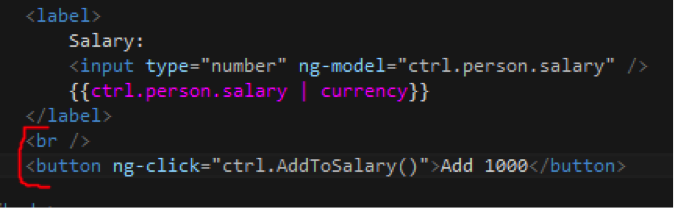
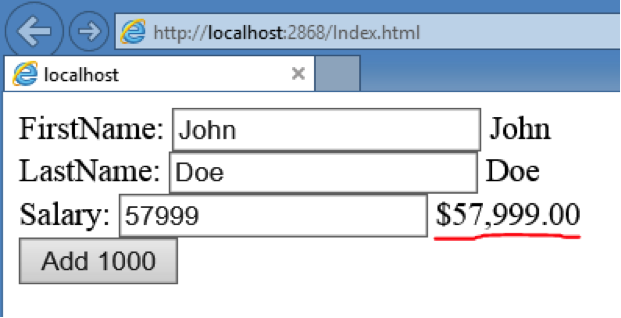
a. Currency Filter – Notice that since we applied the currency filter to the value, it is automatically formatted for us.
b. Changing the Object – Notice that when you click the Add 1000 button, it modifies the object’s salary value and the change is reflected anywhere that person.salary is referenced.
CONCLUSION
I hope this tutorial gave you a brief introduction to AngularJS and some of the fantastic (and time-saving) capabilities it offers. Feel free to post your questions and comments below, or find us on Twitter at @CrederaMSFT.
Contact Us
Ready to achieve your vision? We're here to help.
We'd love to start a conversation. Fill out the form and we'll connect you with the right person.
Searching for a new career?
View job openings