


I first worked with Informatica PowerCenter about six years ago. It was my first introduction to data integration and the extract, transform and load (ETL) process. After completing six months of development work and providing on-call support, I was given the opportunity to take a formal training class offered by Informatica. I was so excited—a few days off-site from work after rotating through several on-call shifts seemed like a mini vacation. To say the least, I was wrong. While I learned a lot through self-teaching and on-the-job training, I realized within the first two hours of training that there were a number of shortcuts and efficiencies yet to be discovered.
With that being said, I would like to share a few of the time-saving techniques I continue to apply in order to maximize my development efforts.
Auto Link Ports
Informatica offers the ability to auto link ports by name or by position. This is a great time-saving option, especially when a mapping has hundreds of ports. Informatica provides several options to link ports, including by order or name. Linking ports by order will link ports from one source transformation to the destination transformation in the order defined within the source transformation. If the ports to be linked in the source and target transformation have the exact same name but different order, choose the option to link ports by name.
Following ETL naming standards, ports are often renamed appending either a prefix or suffix to the original port name. Depending on the transformation or action applied, Informatica may also add a numeric suffix to a port name. Auto link by name provides the option to enter a prefix and/or suffix for either the source or destination transformation.
Example: Auto Linking Ports by Name Using a Prefix
In Figure 1 below, I would like to link the Source Qualifier (SQ_CUSTOMER) to the Expression (exp_TRANSFORMATION). I want to link by column name to the exp_TRANSFORMATION ports that contain the prefix ‘in_’.
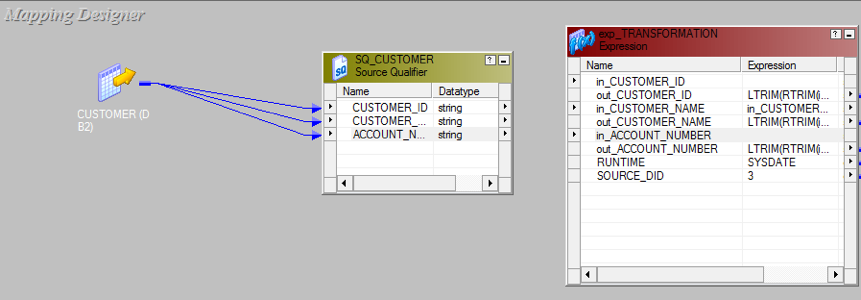

Figure 1 – Auto link Example: Starting Point
Within the Mapping Designer, select Layout > Autolink (see Figure 2).
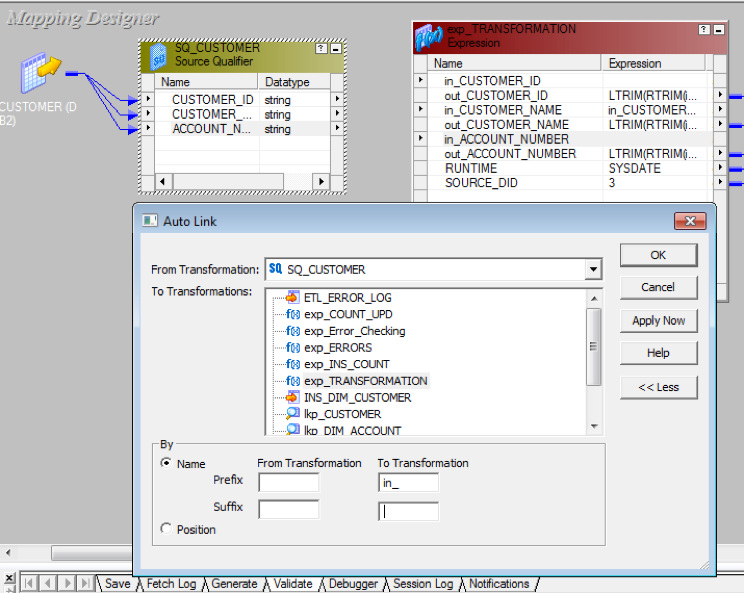
Figure 2 – Auto link Example: Layout -> Autolink
Select the ‘From Transformation’ and ‘To Transformations’.
Select ‘Name’ in the ‘By’ section, and select ‘More’ to expand the options to enter Prefix or Suffix options.
Click ‘OK’.
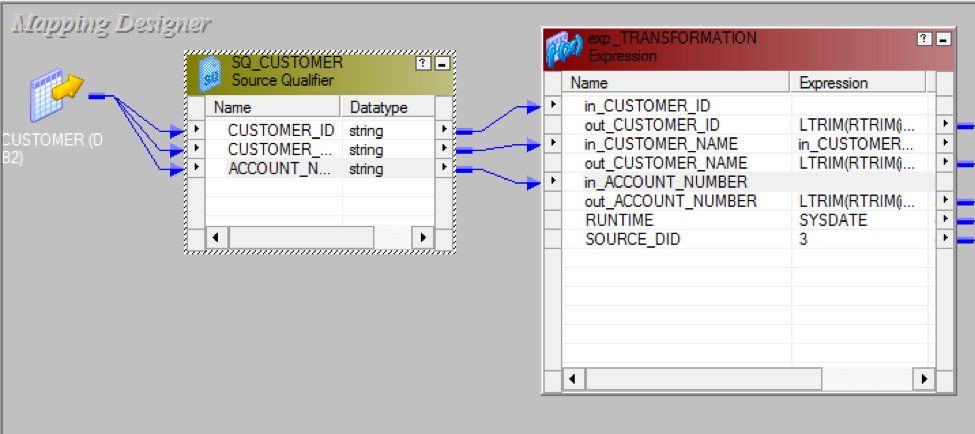
Figure 3 – Auto link Example: Resulting Screenshot
Create Target From Source
While developing in Informatica, there may be times when the target definition is not available to import or the target definition is a flat file and is very similar to the source. Instead of spending valuable development time entering each column name and choosing the data type, here are three alternative options:
Import the target definition for an existing target from a relational target or a flat file.
Create a target definition based on a source definition by dragging a source definition into the Target Designer to make a target definition, and edit it to make necessary changes.
Create a target definition based on a transformation or mapplet by dragging a transformation into the Target Designer.
Example: Create Target From Source
Using the previous example from the Customers table (which is from DB2), I want to create a flat file target with the same column definitions. After dragging the source Customer into the Target Designer, edit and select the ‘Database type’ desired.
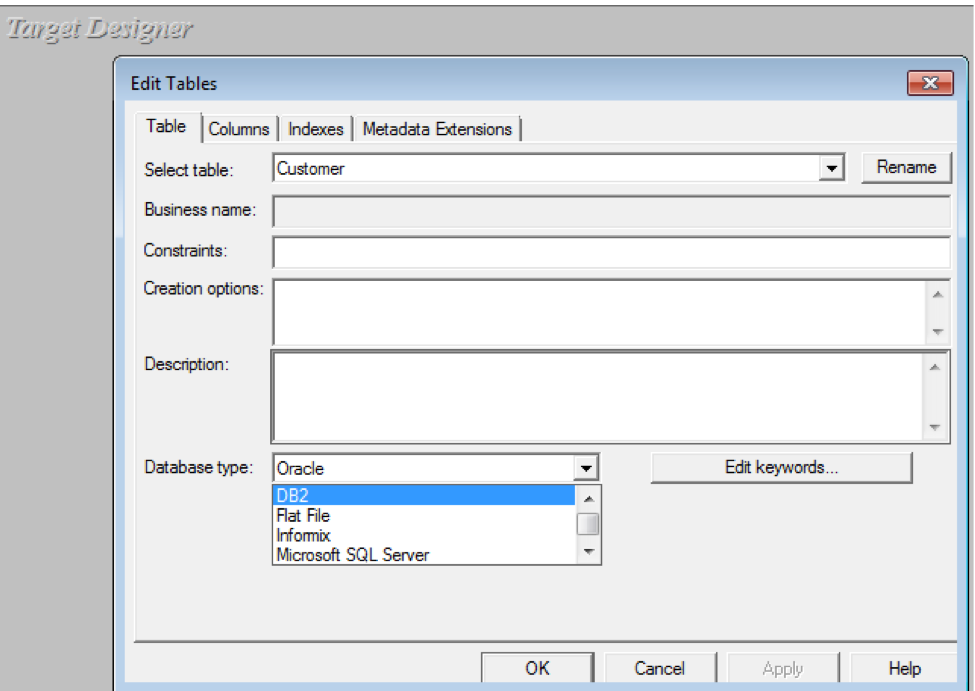
Figure 4 – Create Target From Source Example
Note: If the source type is a PowerExchange Sequence, Informatica allows you to create a target from it, but you cannot change the database type.
Propagate Port Attributes
In the event that the data type within a source definition has changed or a bug has been identified within a complex mapping, you will need to apply changes to all transformations within the mapping that use the original port. Don’t waste time opening each transformation and making individual updates—just use the “Propagate Ports Attributes” function. Informatica allows you to propagate several attributes such as port name, data type, precision, and scale.
Example: Propagate Port Attributes
Right click on the transformation ports of your desired mapping, and select Propagate Attributes. Informatica allows you to see the changes before committing them by selecting ‘Preview’; the changes to be made will be highlighted green.
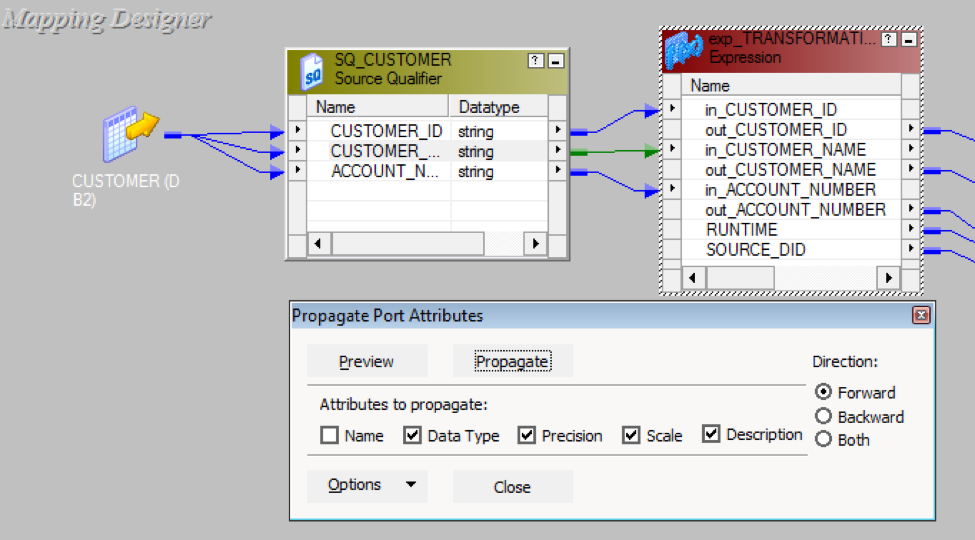
Figure 5 – Propagate Port Attributes Example
Search Tool
This is one feature I rarely used until I had to modify an existing mapping that had over 200 ports. Scrolling through a transformation for one specific port that is in no specific order can be tedious and slows down development time.
Example: Search Tool
This feature works like any other standard search tool to help find columns or ports in repository objects. You can select the binocular icon for more options or simply enter text within the search dropdown after selecting a transformation to search. Below I search for ‘account’.
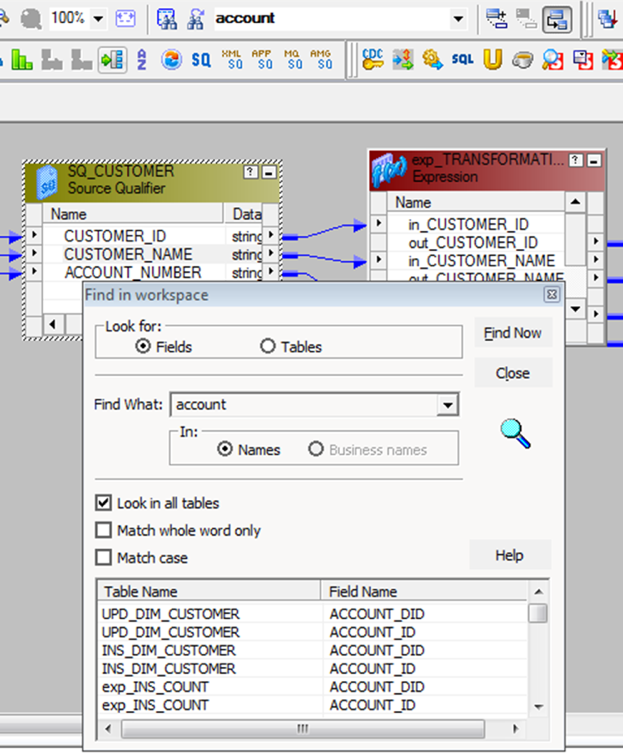
Figure 6 – Search Tool Example
Summary
My hope is that these simple examples will help ease your journey in learning Informatica, as well as providing some time-saving tips that are not readily apparent when teaching yourself. Although some of these tricks are not groundbreaking, it has been my experience that even the smallest shortcuts can make a huge difference.
Contact Us
Let's talk!
We're ready to help turn your biggest challenges into your biggest advantages.
Searching for a new career?
View job openings