


The use of Computer Vision in mobile apps has grown by leaps and bounds over the years, thanks in part to the sensors and powerful processors that keep making their way into mobile devices. Image processing has evolved from offloading the processing of images to remote servers, to simple apps used to scan barcodes or images of checks, to apps that can do real-time face or text detection and other complex image processing tasks on the device.
If you’ve ever researched how to implement things like image tracking, image recognition, or programmatic image filtering in your app then you’ve probably found that one of the most used and talked about libraries is OpenCV. OpenCV is an Open Source Computer Vision library that is widely used in industry and academia for complex real-time image and video processing. According to their website, OpenCV has a user community of more than 47,000 and an estimated 14 million downloads. It’s used for everything from interactive art to mines inspection, from stitching maps on the web to advanced robotics.
Even if you’ve heard of OpenCV or considered using OpenCV for a project, you may not know how easy it is to integrate the library into native mobile apps for Android and iOS. Using this native integration, mobile apps can perform real-time processing, shape recognition, filtering, etc., right on the device with no internet connection or third-party tools.
In this blog post, we will run through how to install and use OpenCV on both Android and iOS, and provide example apps to demonstrate the possibilities for the technology.
OpenCV on iOS
Since OpenCV is originally written in C/C++, the library lends itself well to the iOS platform, which is built on Objective-C (another extension of original C code). Even still, the process can be tough to get your head around and the documentation online is sparse. The main steps to integration on iOS are:
Installation (using CocoaPods or building the framework locally)
Creating an Objective-C Wrapper
Using the OpenCV library methods
Installation
There are two options for installing and linking the OpenCV library with your iOS project: using CocoaPods or building manually from source.
Using CocoaPods:
Install CocoaPods via these instructions.
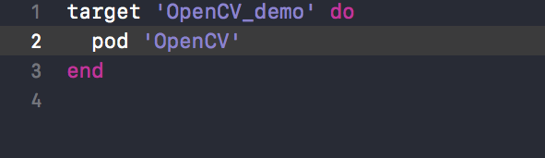
In your Podfile, add the line pod ‘OpenCV’ to add OpenCV as a new dependency:

3. In Terminal, cd to your application directory and run pod install.
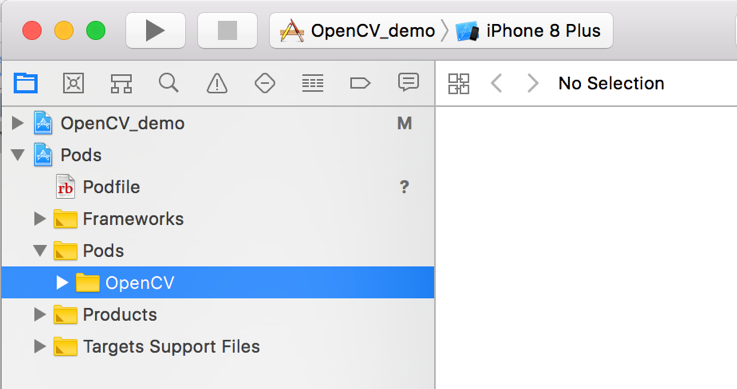
4. Open the project workspace (.xcworkspace not .xcodeproj) in Xcode. You should see a Pods directory with OpenCV included in the list:
Building Manually:
If your project does not use CocoaPods, you can still bring in the OpenCV framework manually by building from source. Follow these instructions to build the framework, then link it with your Xcode project like this:
Select the project Navigator in the left hand panel and click on project name.
Under the TARGETS click on Build Phases. Expand Link Binary With Libraries option.
Click on Add Others and go to directory where
opencv2.framework
is located and click open.
Creating an Objective-C Wrapper
In order to access C/C++ code in our Objective-C/Swift environment, we must create a “wrapper” file that abstracts the OpenCV library behind relevant Objective-C method calls:
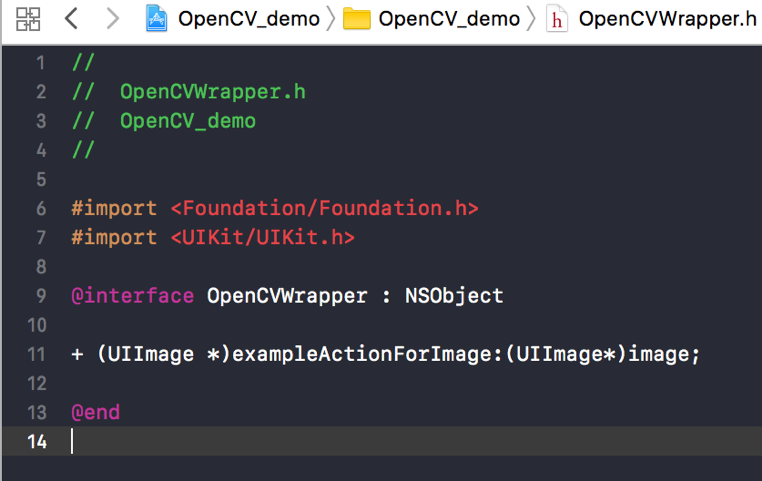
Create a header file called “OpenCVWrapper.h”.
In this file, add interface method(s) for what your app will need to use OpenCV for.
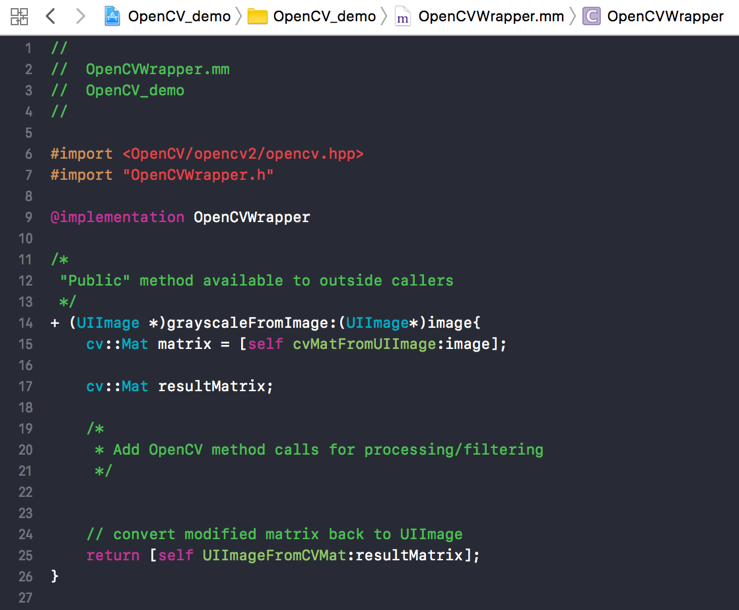
3. Create a new Objective-C file called “OpenCVWrapper”. After it is created, change the file extension from .m to .mm.
4. In this .mm file, you will be able to access the C++ header file from OpenCV. Add an implementation of your exampleAction.
Note: If you plan on doing image manipulation, also add these two stock methods from OpenCV.org.
Using OpenCV Methods
Once you’ve created the OpenCVWrapper.mm file, it is pretty straightforward to call any OpenCV library method using C/C++ syntax. Here’s an example which transforms an image into grayscale:

Breaking it down:
OpenCV method calls and data types should be prefixed by the cv::
Many OpenCV methods take in the input matrix as well as the output matrix as parameters and don’t return anything.
Be aware, the output matrix will be modified as a result of the method call.
Make sure your parameters are in the correct order.
The CV_BGR2GRAY constant is a shortcut from OpenCV that represents the color transformation of a BGR (blue/green/red) matrix to GRAY (grayscale).
Integrating With Swift
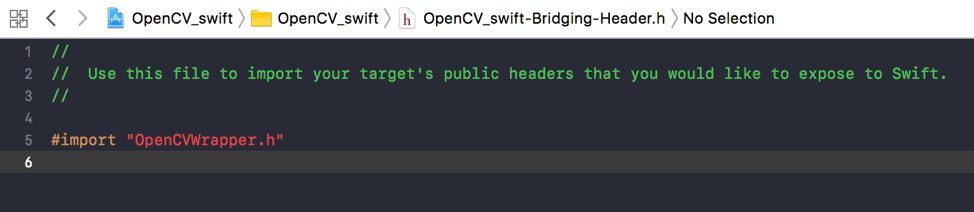
To integrate OpenCV with a Swift project, follow all the same steps above, then add an Objective-C Bridging Header file called “<projectname>-Bridging-Header.h”. This file will allow Swift files to access the methods exposed in the OpenCVWrapper.h file. Once you’ve created the bridging header file, add the following #import statement:
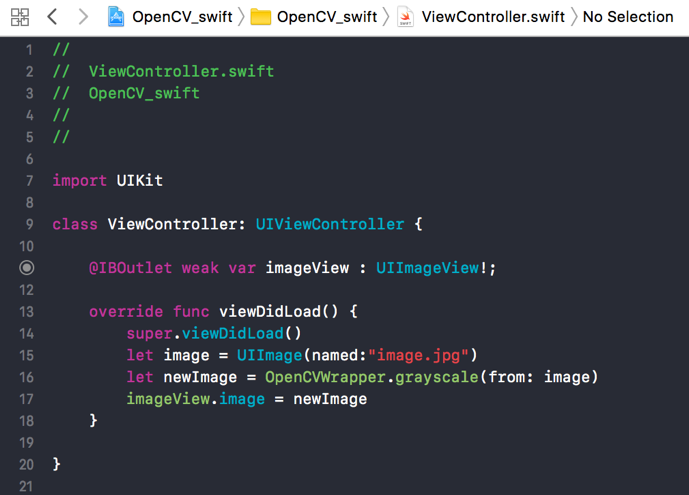
Then, to call methods from your swift file, simply use the OpenCVWrapper() syntax to access Swift versions of all methods in OpenCVWrapper.h:
OpenCV on Android
For Android, we will be leveraging the official Java port of OpenCV. This port provides access to most of the functionality needed from the library and it is more familiar to Android developers who are already well versed in Java.
Installation
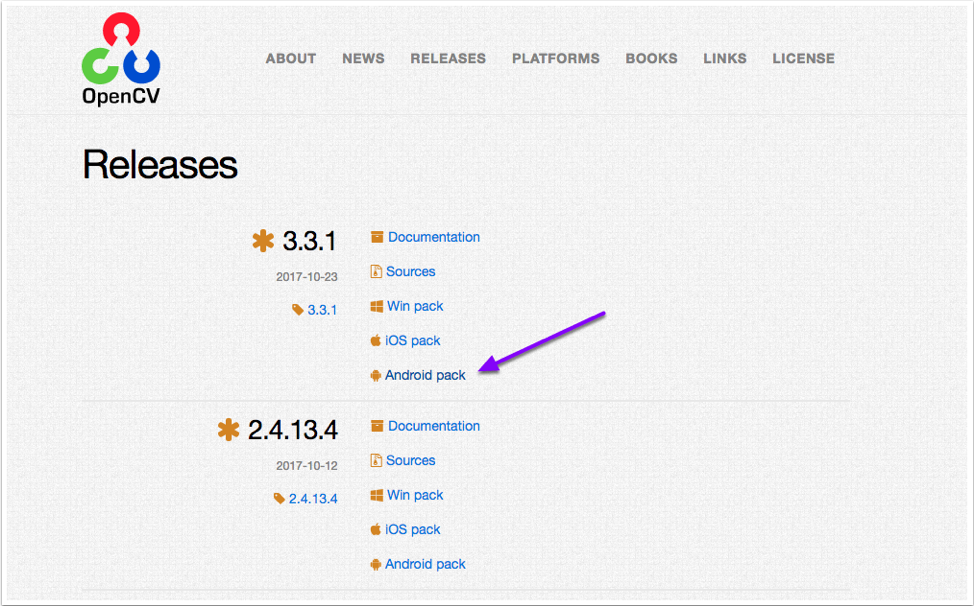
Go to https://opencv.org/releases.html and download the Android pack for the latest release.
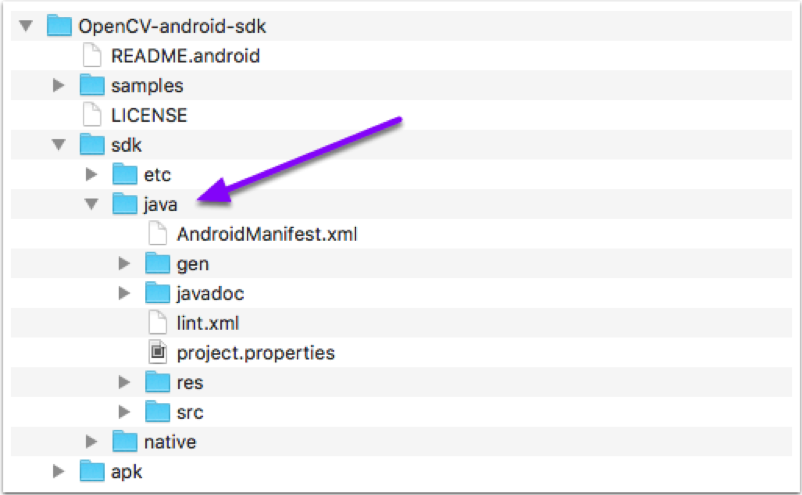
Extract the downloaded archive and verify that there is a java folder inside the sdk folder:
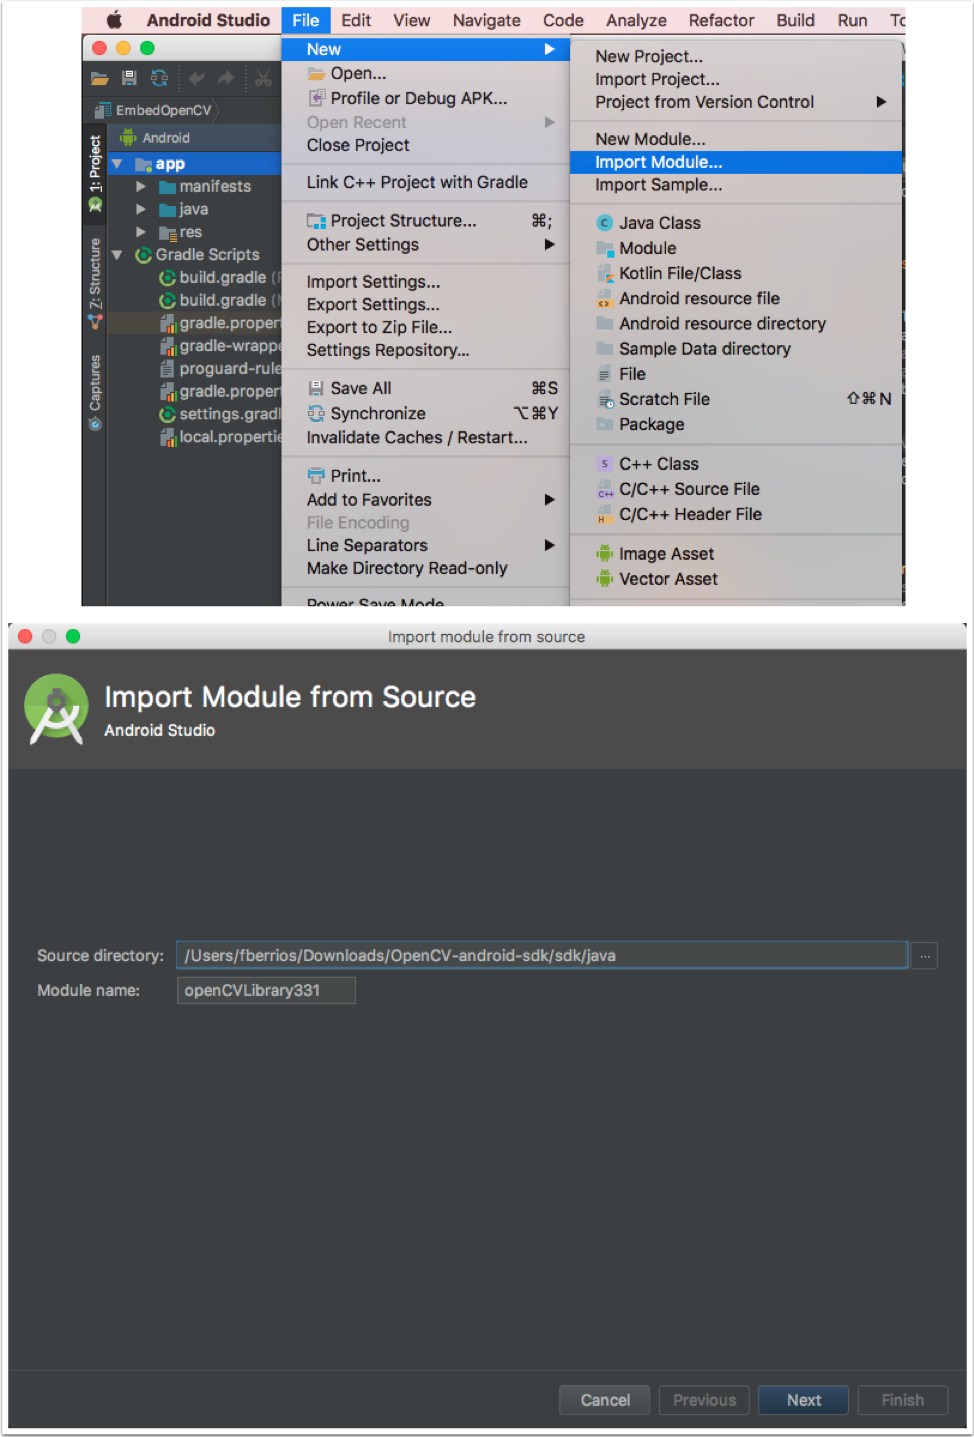
In Android Studio, import the java project from the sdk folder as a new module:
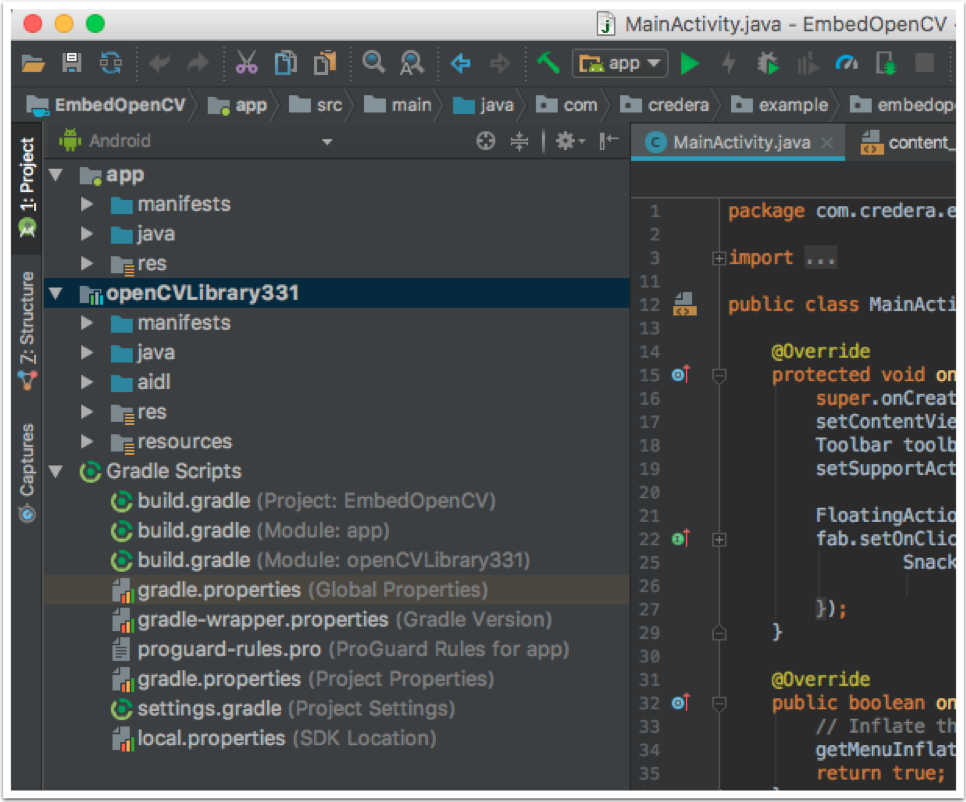
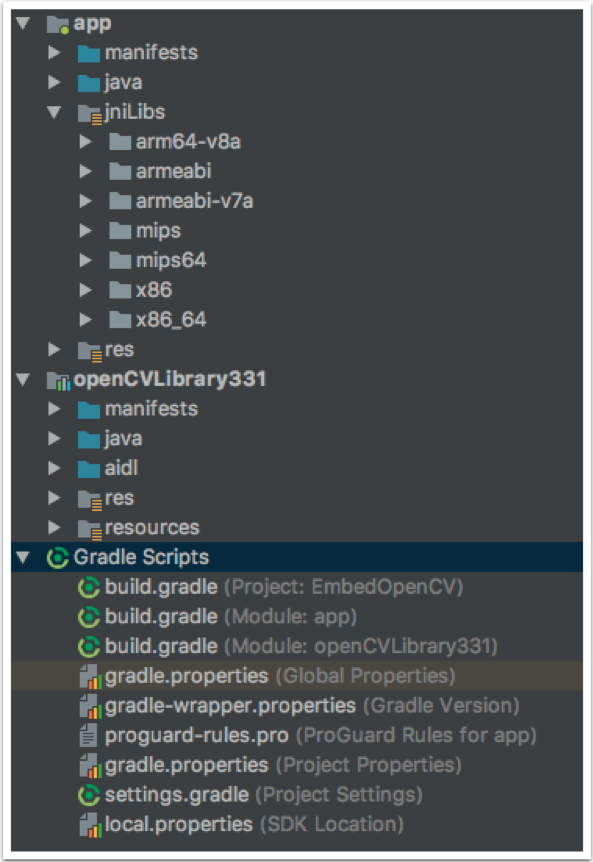
Your project layout should now look something like this:
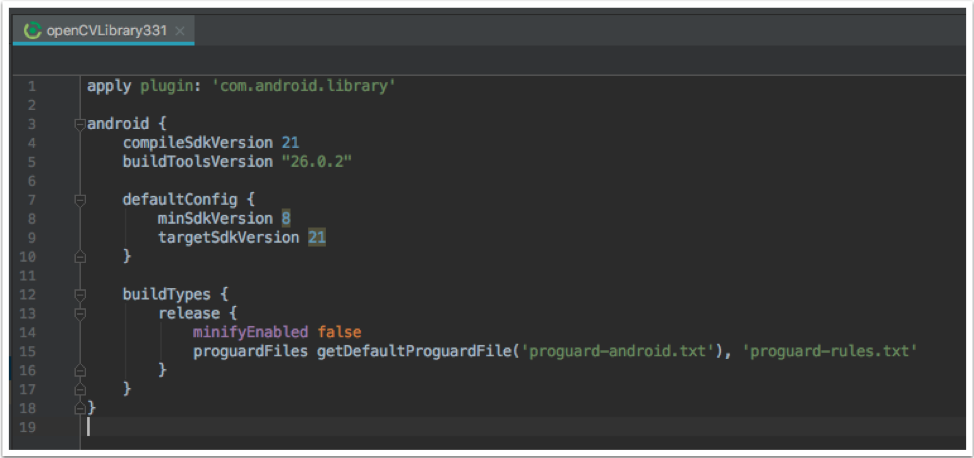
Modify the module’s build.gradle and make sure the compileSdkVersion and targetSdkVersion properties are matching:
Now, add the openCVLibrary331 module as a dependency in your app’s build.gradle file:

Then, copy the folders inside the /sdk/native/libs/ folder to the /src/main/jniLibs/ in your app’s project directory:
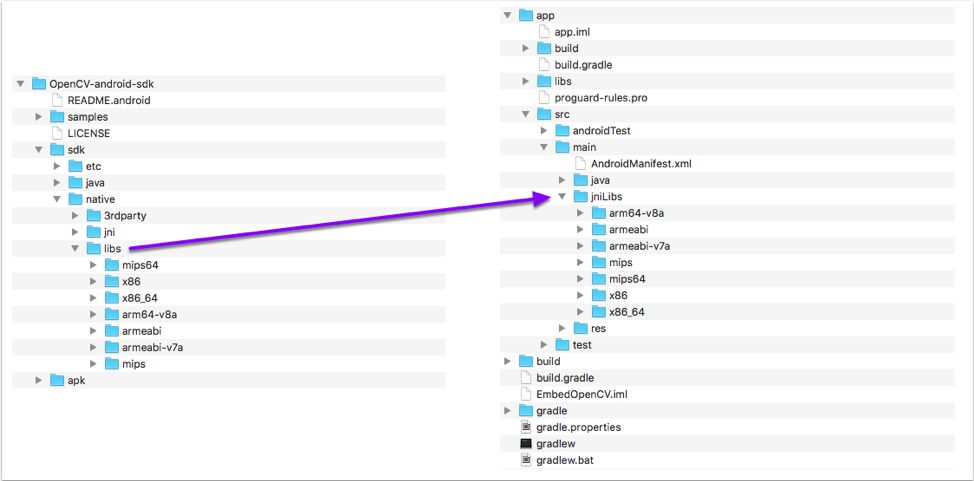
The final project layout should look something like this:
Using OpenCV Methods
Before you can use any of the OpenCV libraries you first need to initialize it:
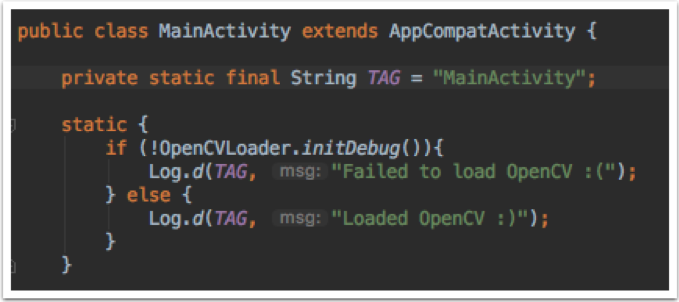
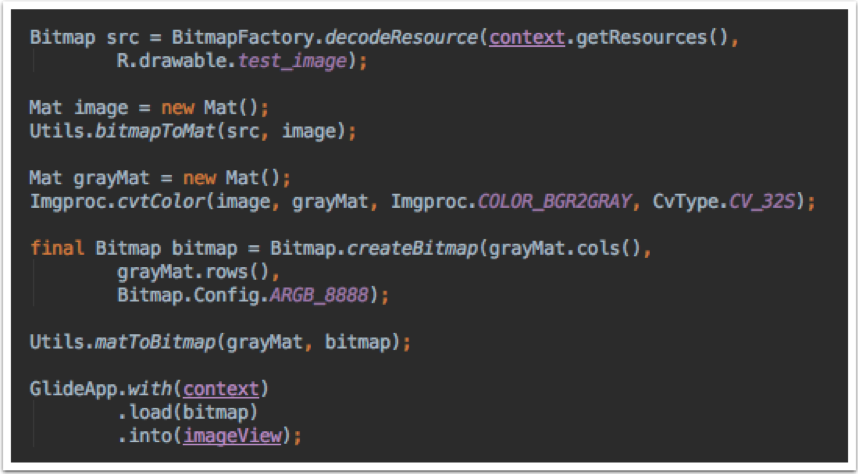
After that, you can freely use all the OpenCV libraries, types, and methods:
Example Apps
Here are links to example Android and iOS apps that use OpenCV to transform an image to grayscale:
While the examples shown here are pretty simple and straightforward, they should help you with setting up your project and creating a good base you can expand upon.
If you have any questions, comments, or feedback, please let us know in the comments below or contact us directly at marketing@credera.com.
Contact Us
Let's talk!
We're ready to help turn your biggest challenges into your biggest advantages.
Searching for a new career?
View job openings