


Authorize.Net is a web-enabled payment gateway that provides a rich application programming interface (API) to process payments for purchases on your website. In most cases, it is used to accept credit card payments on an ecommerce website, providing an infrastructure to quickly and securely process payments under PCI compliance standards.
As part of the Authorize.Net platform, several web APIs are provided to hook into to process payments, check the status of payments, create recurring billing subscriptions, update customer payment information, etc. In this post I will explain how to set up and configure the Transaction Details SOAP web service API using the .NET framework and Visual Studio. This API is used primarily for managing automated recurring billing, retrieving status of payments, and managing custom profile information. For more information about what is included in this API, skip down to the last section where there is a link to the documentation.
Before You Begin
The first step in setting up your payment gateway is to create an account with Authorize.Net. For testing and development, Authorize.Net provides test accounts in their “Sandbox” environment within their developer center.
Once you have created an account and it has been verified (a separate email notifying you that the account is now available), we can start coding.
Accessing Your API Credentials
The next step in setting up your payment gateway is to track down your transaction API credentials.
1) Log in to https://sandbox.authorize.net
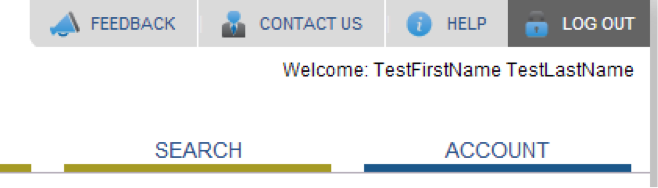
2) Click on the “Account” tab in the main header.

3) The “Settings” section will be shown by default. Click “API Login ID and Transaction Key” (red). If you get an error message, enable the Transaction API via the “Transaction Details API” link (blue).
4) Using the secret question you received in your verification email, take note of the Login ID and Transaction Key. We’ll need these later.
Adding the SOAP Web Service to the Project
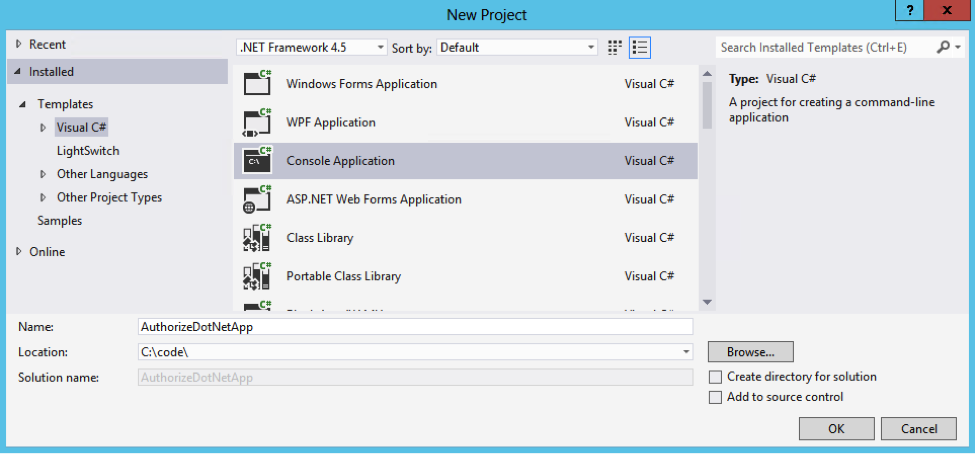
The SOAP web service can be referenced using the “Add Service Reference” functionality within any project. For this example, we will use a simple console application to test the API. We will be using Visual Studio 2012 with .NET 4.5.
1) Create a new project as a console application.
2) Right click the project, and select “Add Service Reference…”
3) Enter the address, https://apitest.authorize.net/soap/v1/Service.asmx and click “Go.”
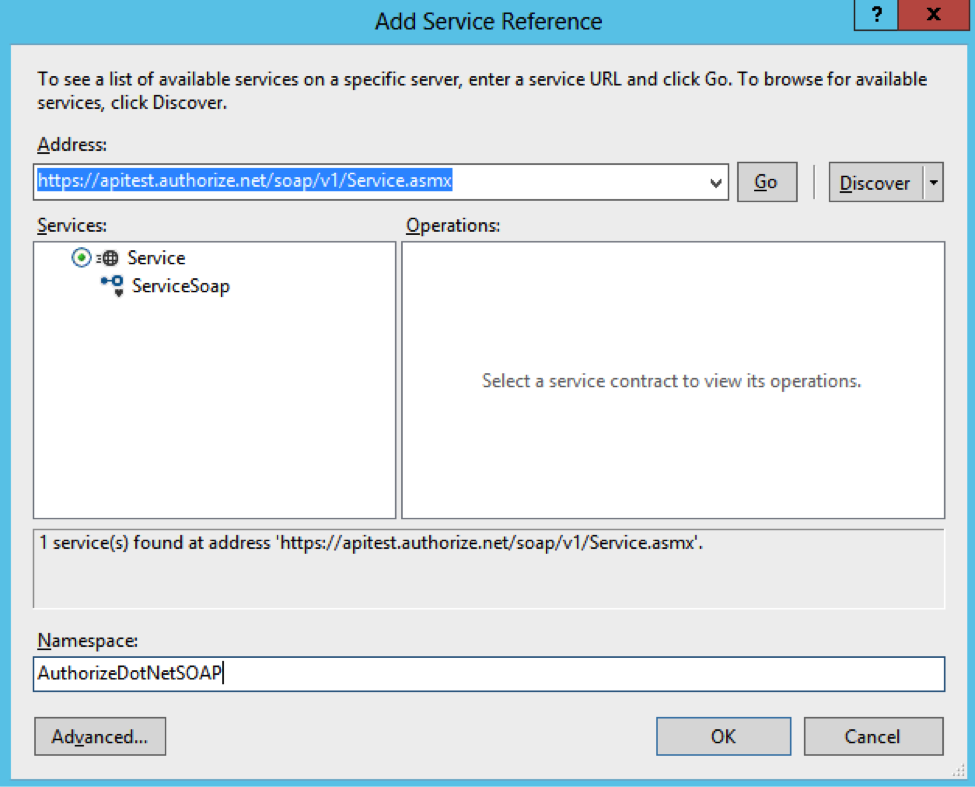
4) Give the service a name, and click “Advanced.” Match the configuration to the picture below.
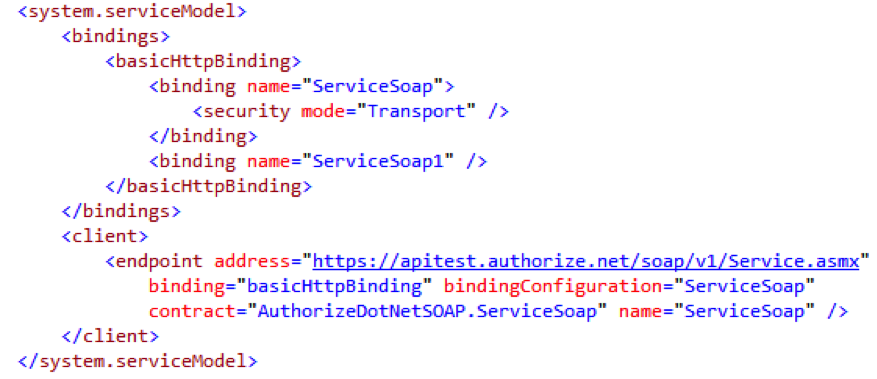
5) Click “OK.” The app.config should now contain information in the system.serviceModel section.
6) Add the login id and transaction key to the app.config. We will use these later, but it’s always best to make these types of values configurable.
Test the API
Finally, we can test our Authorize.Net API connection.
1) First we want to instantiate our ServiceSoapClient object.
2) Then we will want to build our MerchantAuthenticationType object using the login id and transaction key from the app.config.
3) Then we will execute the AuthenticateTest method to test our connection and authentication.
4) Lastly we will output the message responses from the test.
5) You will need to reference your web service and System.Configuration (for the configuration settings) with using statements.
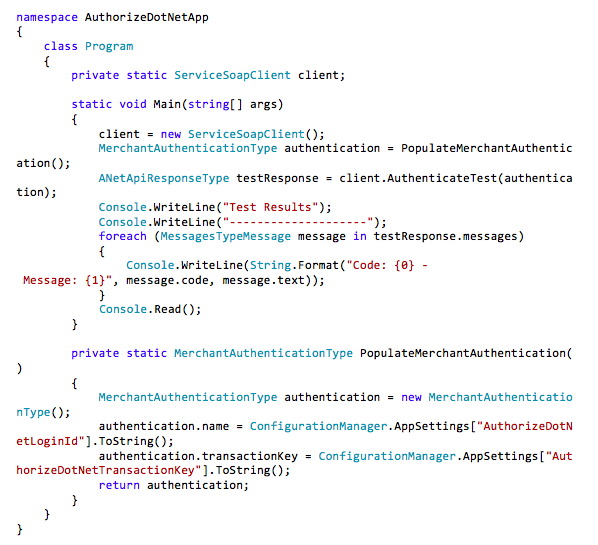
6) Run it!
Next Steps
Now that you have successfully connected to the Authorize.Net SOAP web service, you can do many things. For more information on what is available within the API, you can reference this SOAP Reporting Guide.
If you have questions about this blog post, points of view, or development best practices, please leave a comment below, respond on Twitter, or contact us online.
Contact Us
Let's talk!
We're ready to help turn your biggest challenges into your biggest advantages.
Searching for a new career?
View job openings