


This is part four of a ten-part series on Application Lifecycle Management (ALM) using Visual Studio 2012 and Visual Studio Team Foundation Server 2012. If you missed my previous posts, you may want to read those before continuing (series overview; part one: Teams without Barriers; part two: TFS Online and part three: Tool Overview).
Now that we have seen what results could be achieved by using all or any of the tools above, we will look at what should be your first steps in incrementally adopting Visual Studio as the solution for Application Lifecycle Management (ALM), covering how to get started with your team setup quickly and start using Visual Studio ALM activities at different points in the process. For the purpose of this blog series going forward, I have considered a fictitious project named Fabrikam Fiber, which is widely used for most of the demos in the Microsoft space lately.
Before You Begin
Sign up for Team Foundation Service 2012 on the cloud or install Team Foundation Server 2012 on-premises and put your team’s code under source control.
To sign up for Team Foundation Service on the cloud, please click here. Follow the registration steps and you will have a Team Foundation Service set up for you in seconds. For step-by-step instructions on how to sign up, please refer to my previous blog.
Install the basic configuration with the basic features of TFS on your team’s server. If you would like, you can go back anytime and add features. For step-by-step instructions on how to install Team Foundation Server and Visual Studio ALM please click here.
Either of them will give you a source control repository for your code and all the features needed for performing all the ALM activities.
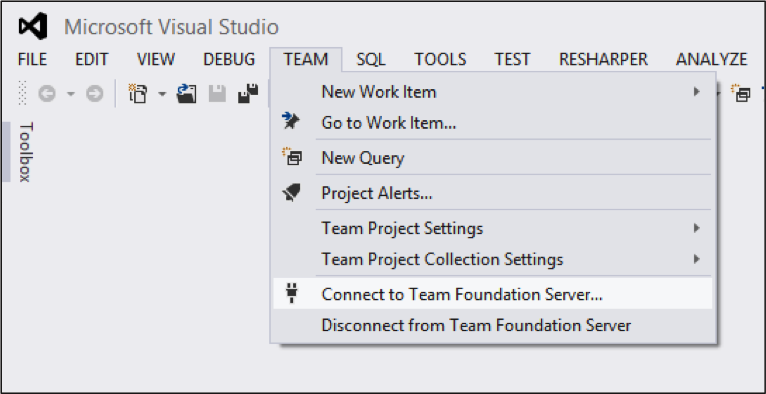
Add source code to version control by connecting your Visual Studio to TFS.
–
Dramatically increase agility and velocity with Microsoft Solutions
Explore Our Microsoft Consulting Services →
–

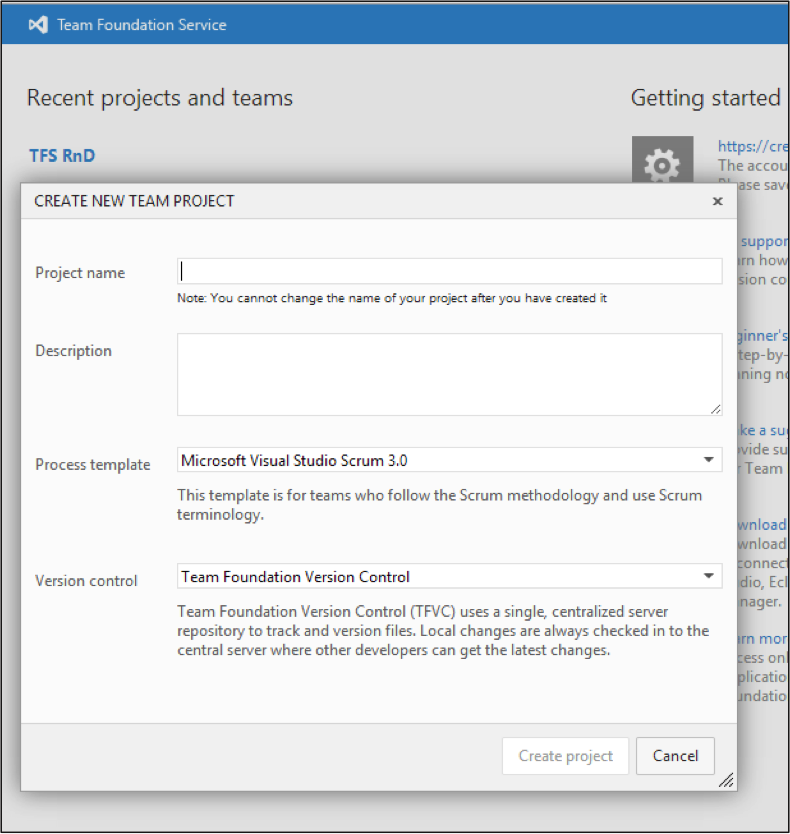
Once connected to TFS and the code is added to the source control, create a Team Project for your team so you can manage and build the project’s code, organize tests, and track work and bugs in TFS. You can create a team project from the Team Explorer or through the web access for Team Foundation Service. Both of them will direct you to the web version of TFS to create a Team Project.
Fill out the New Team Project Information and create the team project. Note that there is a process template to choose from and you can select what suits you the best whether Scrum, Agile, or CMMI.
Add your team members to the team project. All you need is their Live ID or a Windows user in order to add them to the team.
Set up Continuous Integration (CI) build so the team can identify and fix build issues early.
This can be set up through Visual Studio under Team Explorer or through the web interface for Team Foundation Service.
You can select what type of build you need, such as a Manual one where the build is not triggered by check-ins, a Continuous Integration build which builds for each check-in, Rolling builds, Gated Check-in builds, or Scheduled builds.
You can also select a drop folder if you like or tell TFS to drop it on the server.
Once everything is done, hit Save and the build is created.
Now that you have signed up with Team Foundation Service, added your source code to the source control, created a new Team Project for your team and setup a Continuous Integration (CI) build on the build server, we will explore how to do Backlog Management in my next post in the series.
If you have questions about this blog post, points of view, or development best practices, please leave a comment below, respond on Twitter, or contact us online.
Contact Us
Let's talk!
We're ready to help turn your biggest challenges into your biggest advantages.
Searching for a new career?
View job openings