


A lot has been written about the benefits of “build once, deploy many,” and I agree wholeheartedly with the idea. The problem I have seen many times is that a build and deploy process is created for the development server in Jenkins, but then as new environments are added, the whole Jenkins job is copied.
Instead of “build once, deploy many,” the process becomes “build many, deploy many.”
I recently ran into this situation again and decided to break the mold that had already been created for the client’s environment.
The Jenkins build had the typical Maven build steps:
Source Code Management with a checkout from Git
A build trigger, which is triggered remotely from Git
Maven build with the usual pom.xml and goals
Post Build Findbugs analysis results
A batch script that stops the DEV Tomcat server, deletes the WAR file, deletes the exploded WAR directory, and then restarts the Tomcat instance
A ‘Deploy war/ear to a container’ task to deploy to the DEV server
Email notification to the development team
The QA, staging and production Jenkins jobs were copies of this with the necessary environmental tweaks.
What I wanted was a build that included steps one through five, but then steps six and seven determined per environment.
I have seen this problem solved with different approaches. Every solution involved some form of a custom developed Deployer and used a combination of batch tasks, shell scripts, Java code, and configuration files. I did not have the time or inclination to reinvent the wheel.
For easy rollback, and because I could not see a quick way to change the Jenkins Maven job back to a freestyle job, I manually created a new Jenkins Freestyle project with steps one through five.
To create multiple deploy jobs, I did not want to handcraft any new shell scripts or hard code file locations. I wanted to be able to use Jenkins artifact archiving for rollbacks.
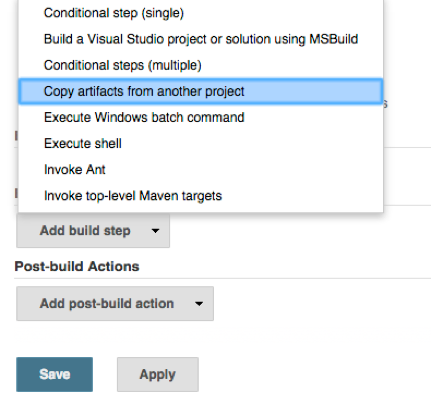
To do this I added the Copy Artifact plugin to Jenkins. The plugin allowed me to create a deploy job per environment, and the deploy job could use the WAR from the Build job.
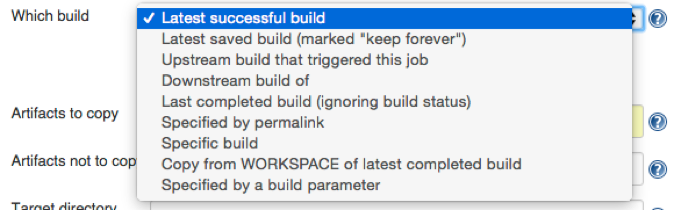
The “Copy artifacts from another project” build step became available when the plugin is added to Jenkins.

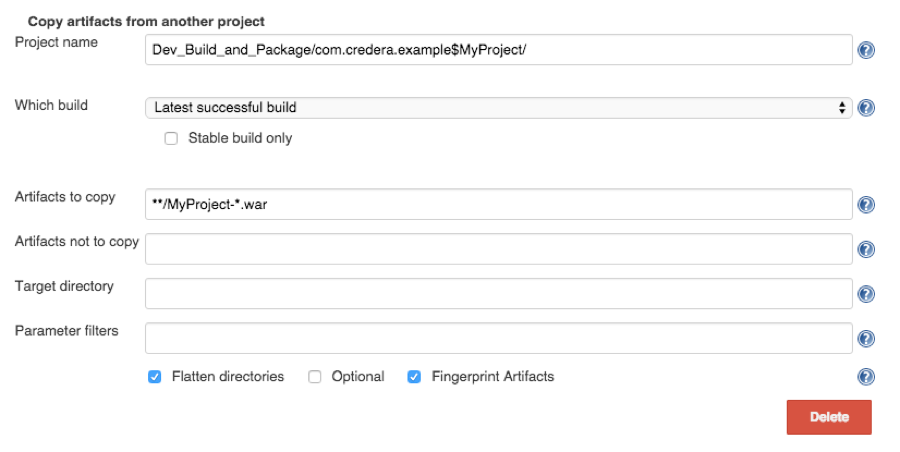
On the “Copy task,” I entered the Maven module details for the WAR and checked the “Flatten directories” checkbox.
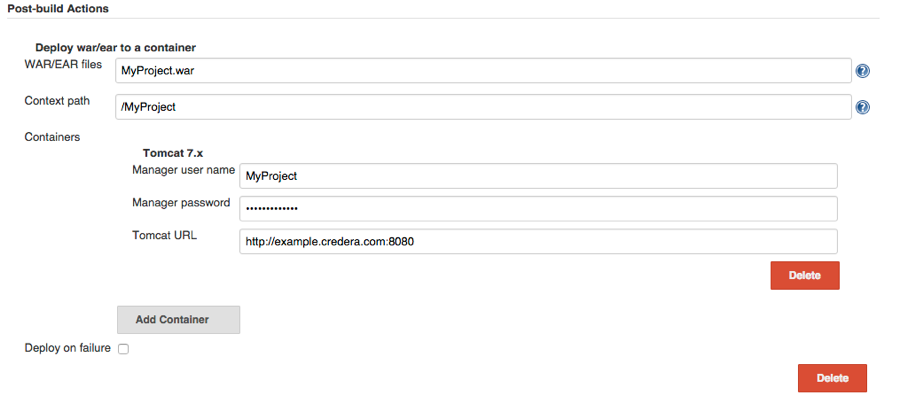
Next, I added the Tomcat deployment task for the applicable environment as a Post-build Action.
Because of the Flatten directories checkbox, the WAR file can be referenced without any directory names.
After adding jobs for each of the environments, the Development stream in Jenkins now looks like this:
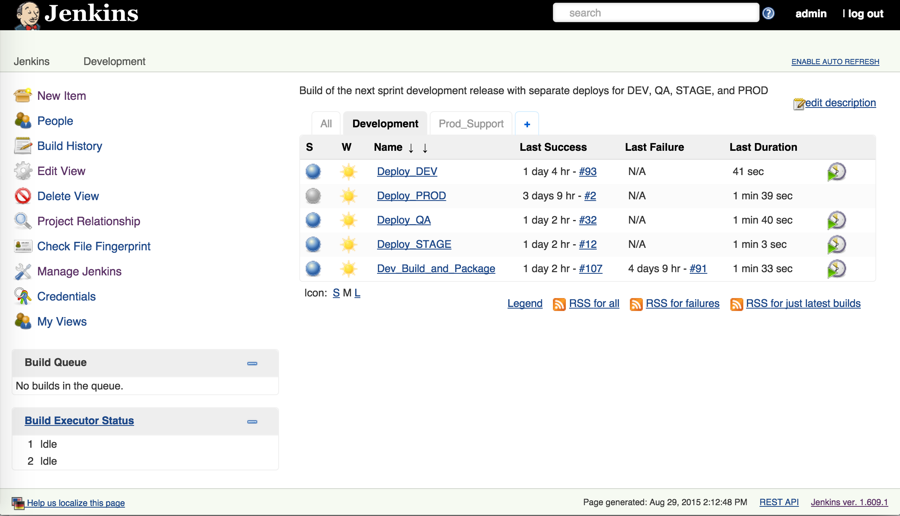
The solution was quick, easy, and meets the current needs well.
One of the options under “Which build” is “Specific build,” which can be used to easily rollback to a previous version. The “Keep Build Forever” option can be used for builds that get deployed to production so they are available for a future rollback.
Other options with similar functionality are the Artifact Deployer plugin and the Copy to Slave plugin for situations where the WAR needs to be copied between the Jenkins master and slaves, or for example, your deployment requires the WAR to be on the target server.
Contact Us
Let's talk!
We're ready to help turn your biggest challenges into your biggest advantages.
Searching for a new career?
View job openings