


In a recent project, I needed to map a series of Java model objects that were mostly similar but had to be kept separate (data transfer object, domain object, API response object). In the past, I’ve had plenty of success using ModelMapper, but after attempting some complex mappings and getting frustrated with runtime exceptions due to missing or incorrect configurations, I decided to explore alternatives. It didn’t take me long to find and adopt MapStruct. These are the features that won me over:
Mapping classes are generated during compilation and no runtime processing or reflection is used.
Mapping classes use simple method invocation, which makes them really easy to debug.
MapStruct uses a pragmatic convention over configuration approach, but there are still many configuration options available via Java annotations.
In the rest of this article I will walk you through the steps needed to integrate MapStruct into a Spring Boot project.
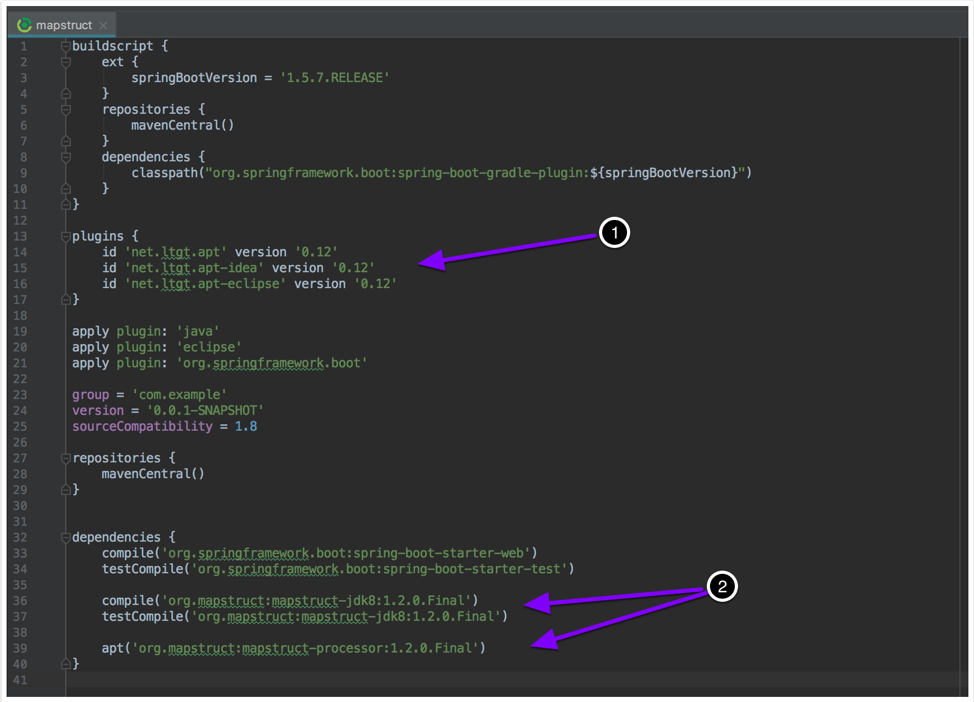
1. Add Plugins and Dependencies
First, you’ll need to add the necessary plugins and dependencies to the build.gradle file.
Depending on what version of Gradle you’re using, you might need to use these plugins to help with the Java annotation processing.
Note the ‘-jdk8’ on the MapStruct dependencies. You’ll only need this when using Java 8 or later.

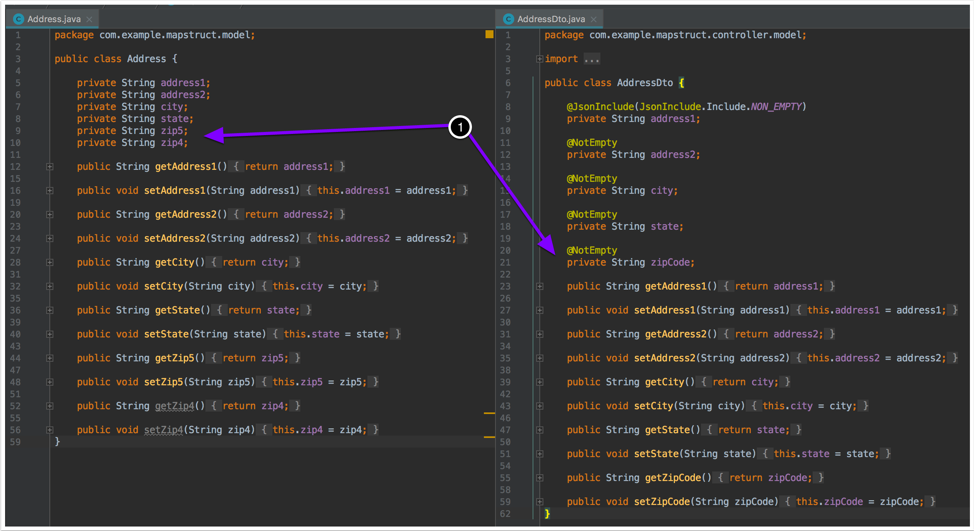
2. Pick Your Objects
Pick the two objects you want to map. In this example, the classes are pretty simple and very similar except for the postal code fields.
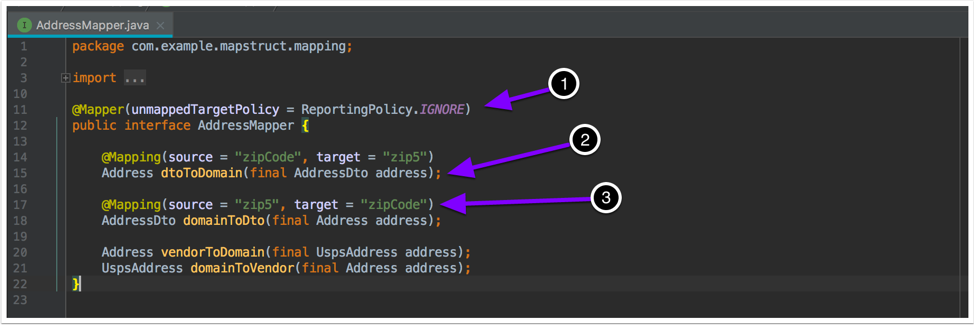
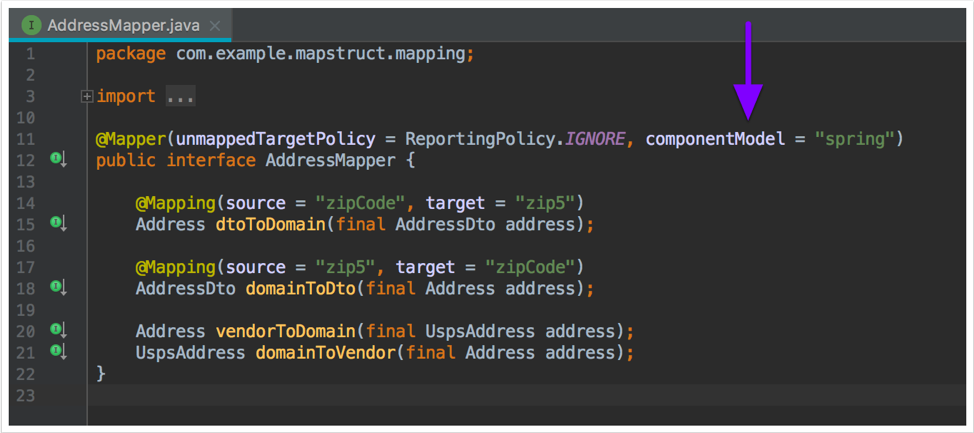
3. Create Your Interface
Create an interface with methods for mapping between objects.
Add a @Mapper annotation to the interface.
The method signature will generally need to have a similar structure to this (i.e., input is the object being converted, output is the converted object).
Use the optional @Mapping annotation to configure additional mapping behavior (e.g., differently named properties, explicitly ignoring certain properties, format conversions, etc.).
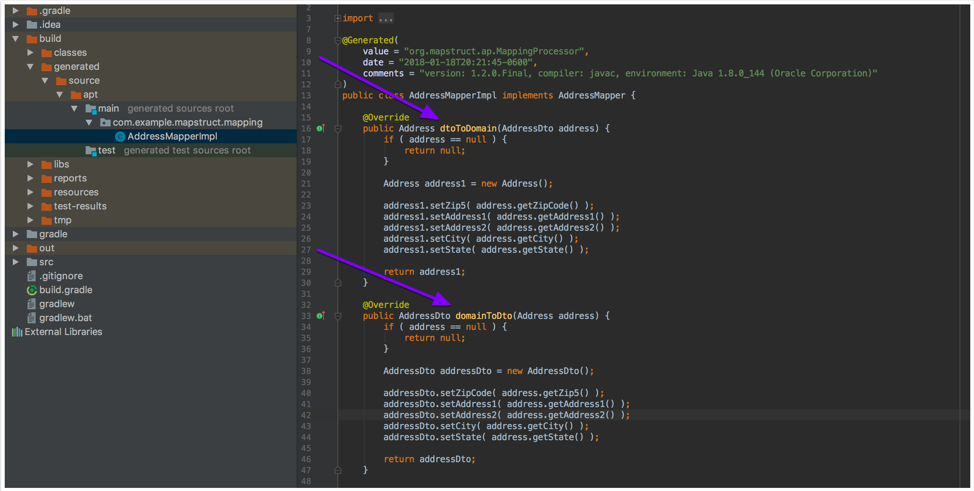
4. Run ‘gradle build’
This will generate a class with implementations for all the methods from the interface defined in the previous step. Make sure to re-run ‘gradle build’ before you try to use the mapping classes for the first time or if you’ve made any changes to the mapping interfaces (running a ‘gradle clean’ before building is recommended).
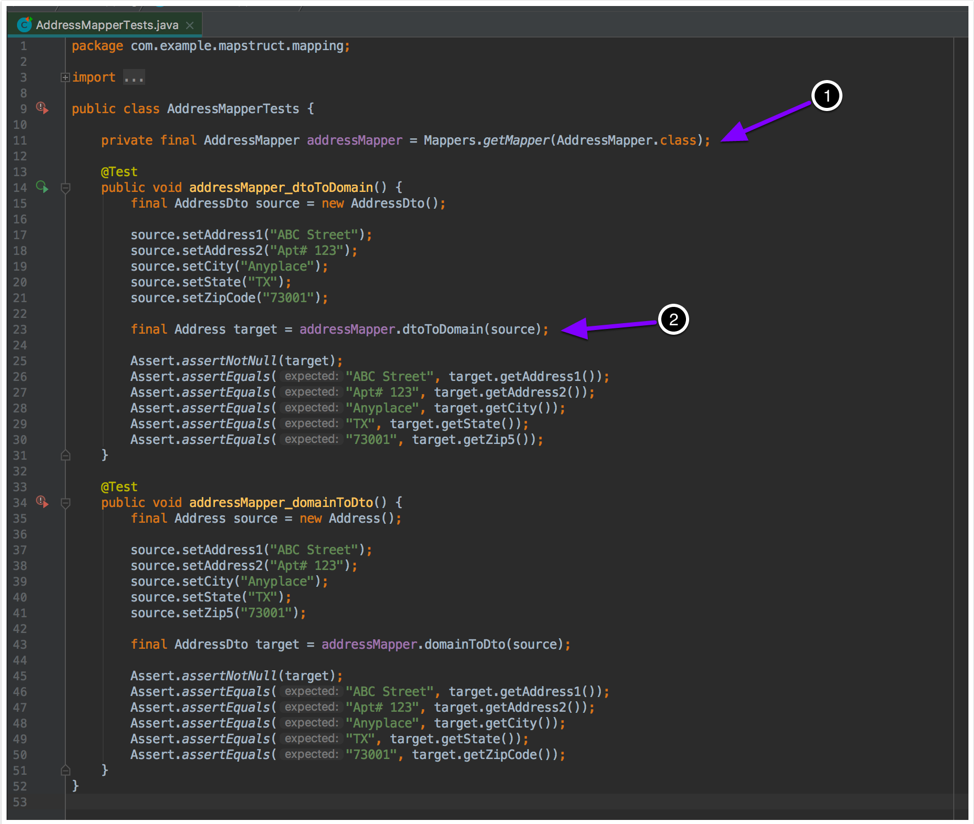
5. Manually Get and Use Mapper Class
Here are examples of how to manually get and use an instance of a mapper class:
Manually create an instance of the mapper class.
Here’s an example of using the mapper class methods.
6. Configure MapStruct
Now you’ll need to configure MapStruct to use Spring’s dependency injection. Add a ‘componentModel’ attribute with the value of ‘spring’ to the @Mapper annotation in the mapper interface.
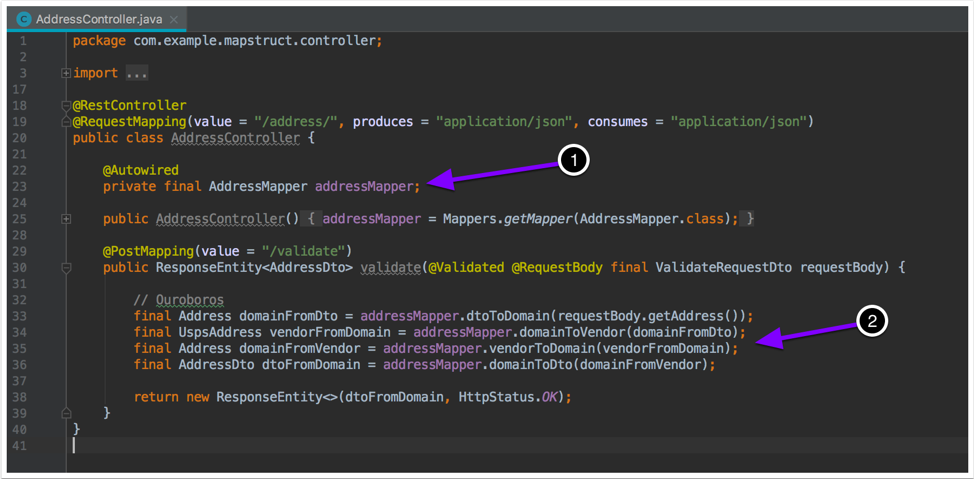
7. Automatically Get and Use Mapper Class
Here are examples of automatically getting and using an instance of mapper class:
Use Spring’s @Autowired annotation to get an instance of the mapper class.
Here’s an example of the various mapping methods in the mapping interface.
8. Done!
Your project should now be set up to continue creating new mapping interfaces and enjoy the benefits of MapStruct. For more information on all the rest of the features and customizations available, check out the reference documentation.
If you have any questions, comments, or feedback, please leave a comment below.

Whitepaper
Oct 12, 2021
Redefining Data Governance: How to Let Data Govern Your Organization
Today’s organizations are failing to find success with top-down, traditional data governance. The following whitepaper outlines a strategic approach for success in redefining...
GET THE WhitepaperBlog
Oct 24, 2019
3 Tips for Creating Data Visualizations With Impact
A majority of the population—65% of people—are considered visual learners, according to the William Bradford. An even more...

Blog
Jan 24, 2025
5 keys to a modern data architecture
Companies across all industries are realizing the value of analytics and want to make sure they’re able to fully leverage...


Contact Us
Let's talk!
We're ready to help turn your biggest challenges into your biggest advantages.
Searching for a new career?
View job openings