


Dynamic capacity, fast deployment, snapshots, and reduced administrative costs are all top reasons to move to a virtualized infrastructure. Compare virtualization to a moist, decadent cake after living on dry bread with your physical servers for so many years. The icing on the virtualization cake is deploying failover clustering to make those virtualized servers highly available!
Recently I had the opportunity to upgrade a Hyper-V server from stand alone to a two-node cluster. All of the virtual machines (VMs) were stored on a single iSCSI target drive, H:\. I could make them all highly available right away, but due to the shared disk drive as a resource every VM would failover together. I count not load balance the workload across the two Hyper-V nodes in this storage configuration. I needed to move the storage in a way that would not cause excessive downtime and allow for VMs to reside in individual failover roles so they could run on separate hosts.
For a detailed guide to setting up a new Hyper-V failover cluster, follow this link.
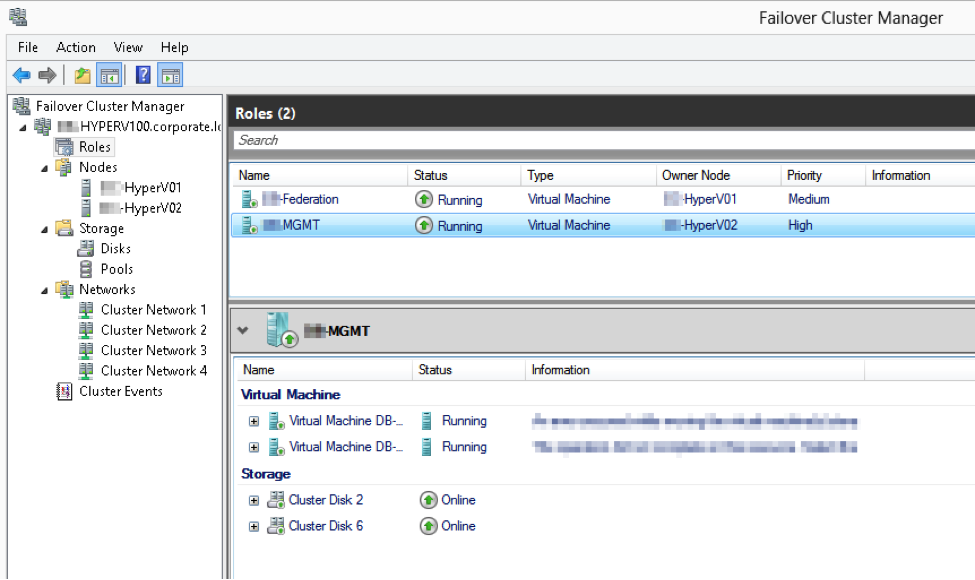
Figure 1 shows the failover cluster role MGMT running on HyperV02 with two VMs. This is the heart of the problem: multiple VMs in a single role due to a shared cluster disk resource. While it is possible to want certain VMs to always be on the same node, for this blog we want to ‘fix’ this so they can be split apart.

The first step in the conversion process will be to present a new iSCSI disk to the cluster as a Cluster Shared Volume (CSV). Configure the disk on one node without assigning a drive letter, then in Failover Cluster Manager (FCM), click Add Disk, identify the new disk, and add it as CSV, C:\ClusteredStorage\VolumeX.
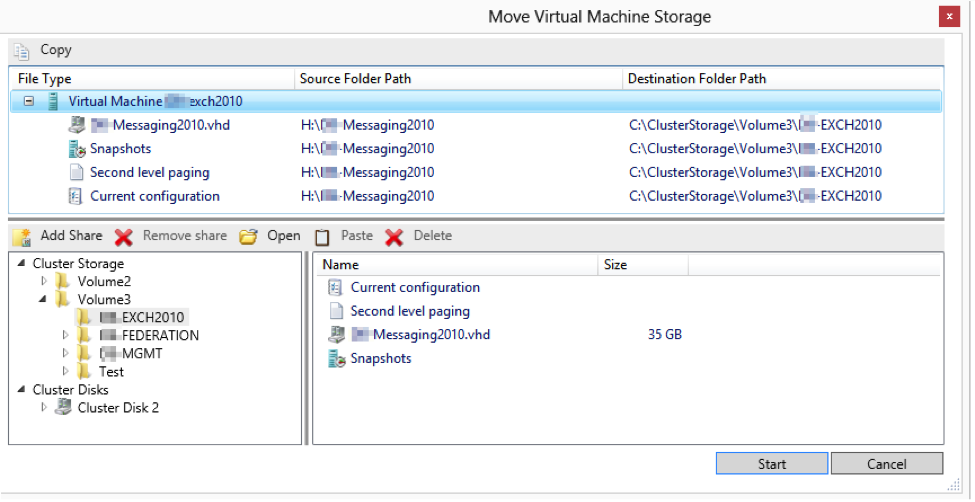
Create a subdirectory for each VM on the new CSV. I used the name of each VM for the directory name. Be sure to “eject” any optical discs from the VMs. On each VM, click Move -> VM Storage, and move the storage from H:\ to C:\ClusteredStorage\VolumeX\<VM-Name>. This step will take the most time and will vary based on size of virtual hard drives (VHDs) and the speed of the live migration network. Figure 2 shows the individual VM “exch2010” with source folder on the H:\ being moved to the CSV destination.
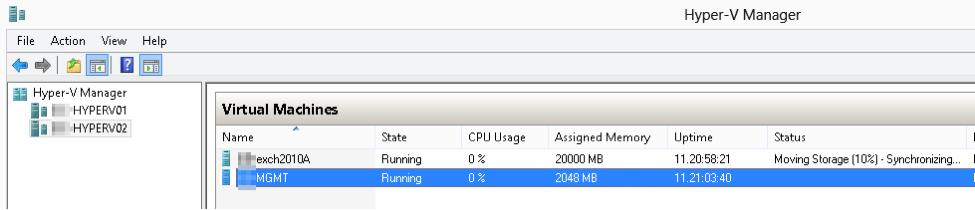
Click start and the storage will be moved while the VM is running (Server 2012 feature) as you can see in Hyper-V Manager below in Figure 3.
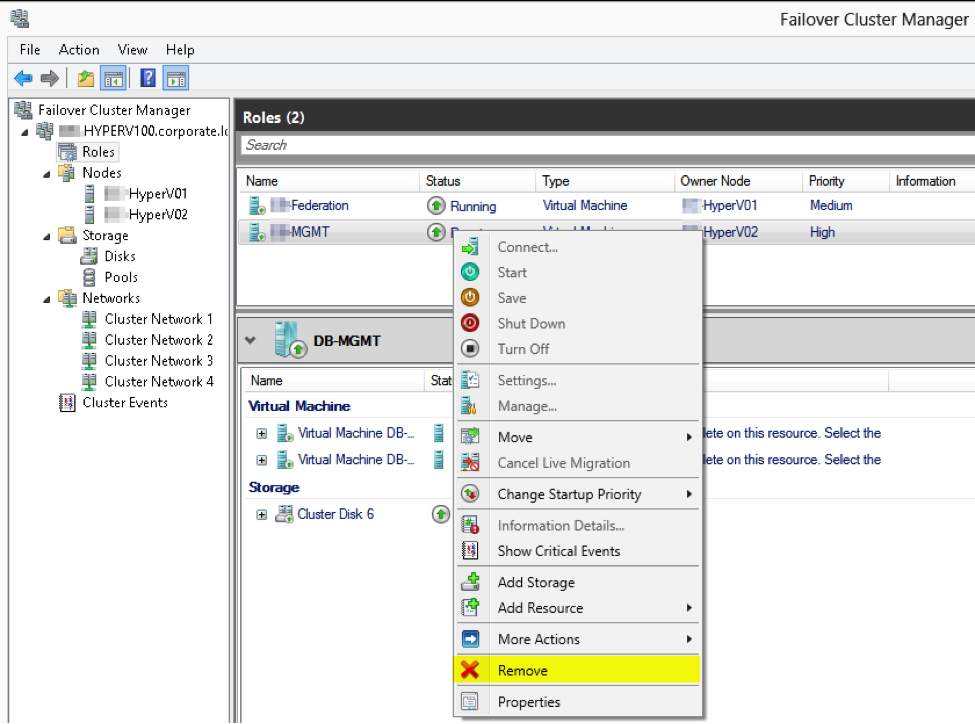
Next we need to remove the role that contains the two VMs. In FCM, right-click the role and click remove (see Figure 4).
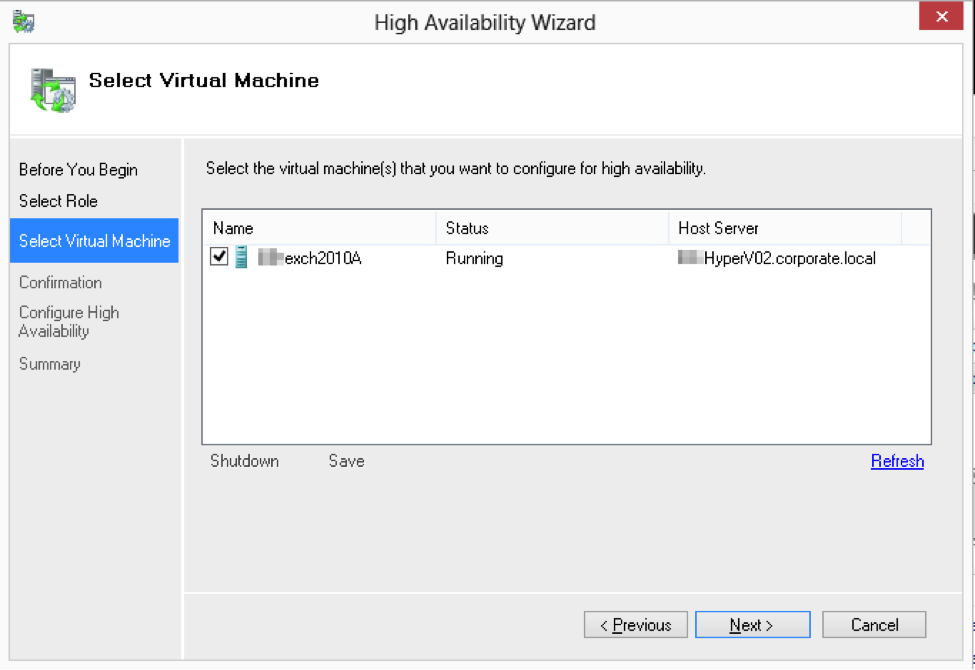
Now we can add the VMs to a new Virtual Machine failover cluster role via the New Role wizard. Choose Virtual Machine as the type of role, select the VM from the list (Figure 5), make other high availability (HA) configuration settings as needed and click Finish.
Repeat this last step for each VM if the other VMs in the old role need to be made highly available. Create a new role for each VM so granular control over failover can be kept for load balancing.
Hyper-V in Windows Server 2012 moved storage on a live Exchange 2010 server without the loss of a single ping. Outlook 2010 never registered a loss of connectivity! Run a few quick tests and balance VMs across the Hyper-V hosts. For my VM live migration test with 20 GB of static memory assigned to Exchange across a 1GB network connection, a single ping was lost. Hyper-V 2012 is a cost-effective virtualization solution that improves scalability and performance of your servers.
If you are considering moving to Hyper-V 2012 to take advantage of decreased licensing cost and increased performance, Credera can help. Contact us at findoutmore@credera.com.
Contact Us
Let's talk!
We're ready to help turn your biggest challenges into your biggest advantages.
Searching for a new career?
View job openings